Ereban Shadow Legacy
Engine: Unity
Languages: C#, HLSL, MaxScript, Python
Tools: Shadergraph, VFXGraph, Renderdoc, Nvidia Nsight
In this first part of the technical breakdown we will be talking about Ereban Shadow legacy technical challenges and some of the different solutions that were created during the development to improve some of the problems that such a technical challenging mechanic and ambitious graphic style generated to the development team.
In order to continue with the breakdown, we will talk about three different aspects of the development: Graphics, Gameplay and Tools.
These three topics represent most of the work that I did for Ereban, apart from other company related tasks.
Gameplay Programming:
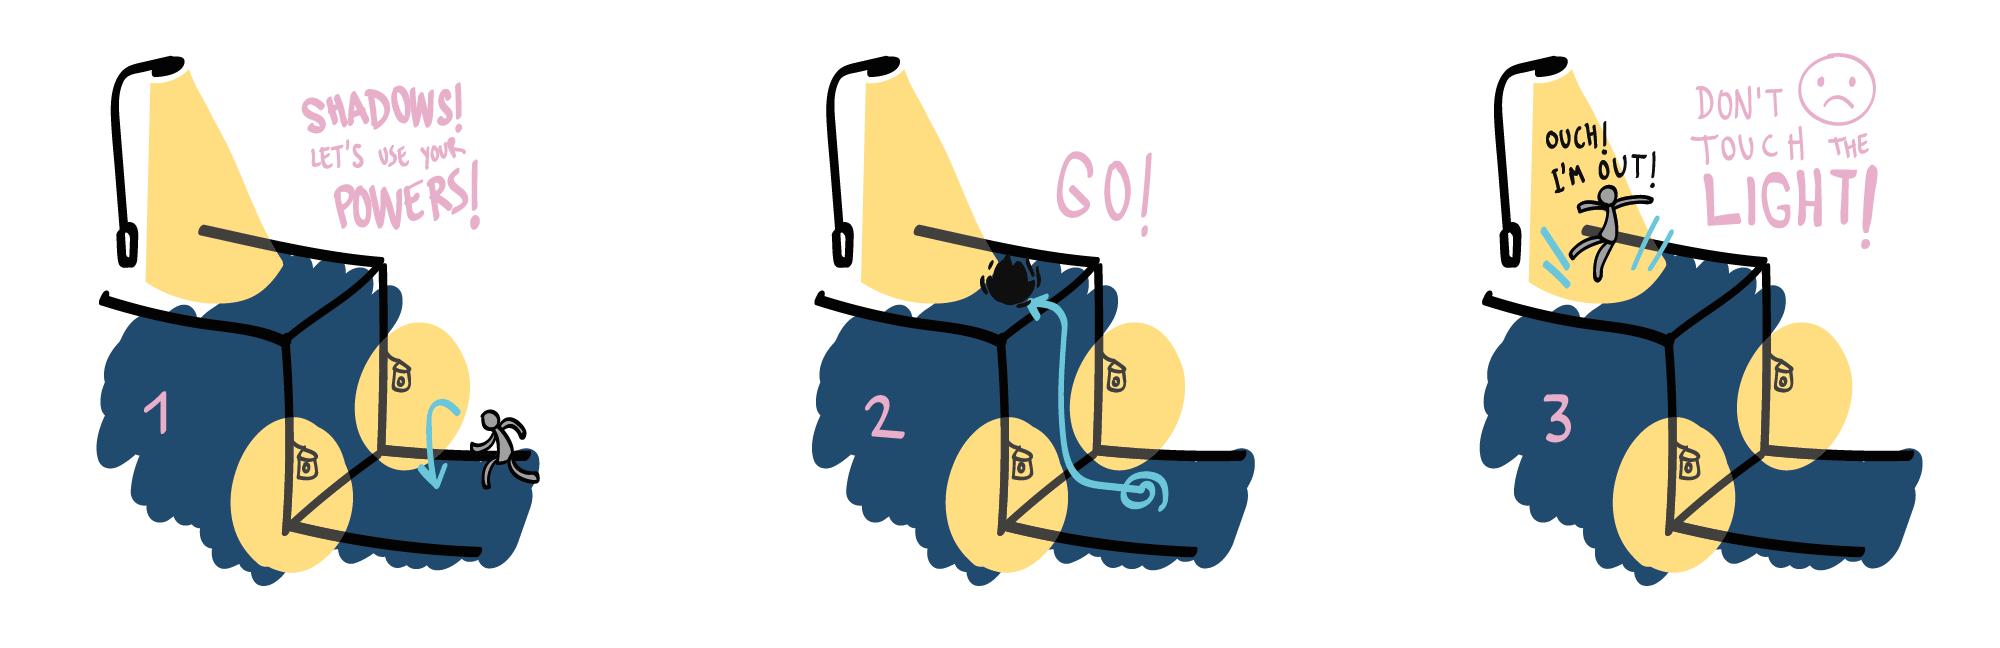
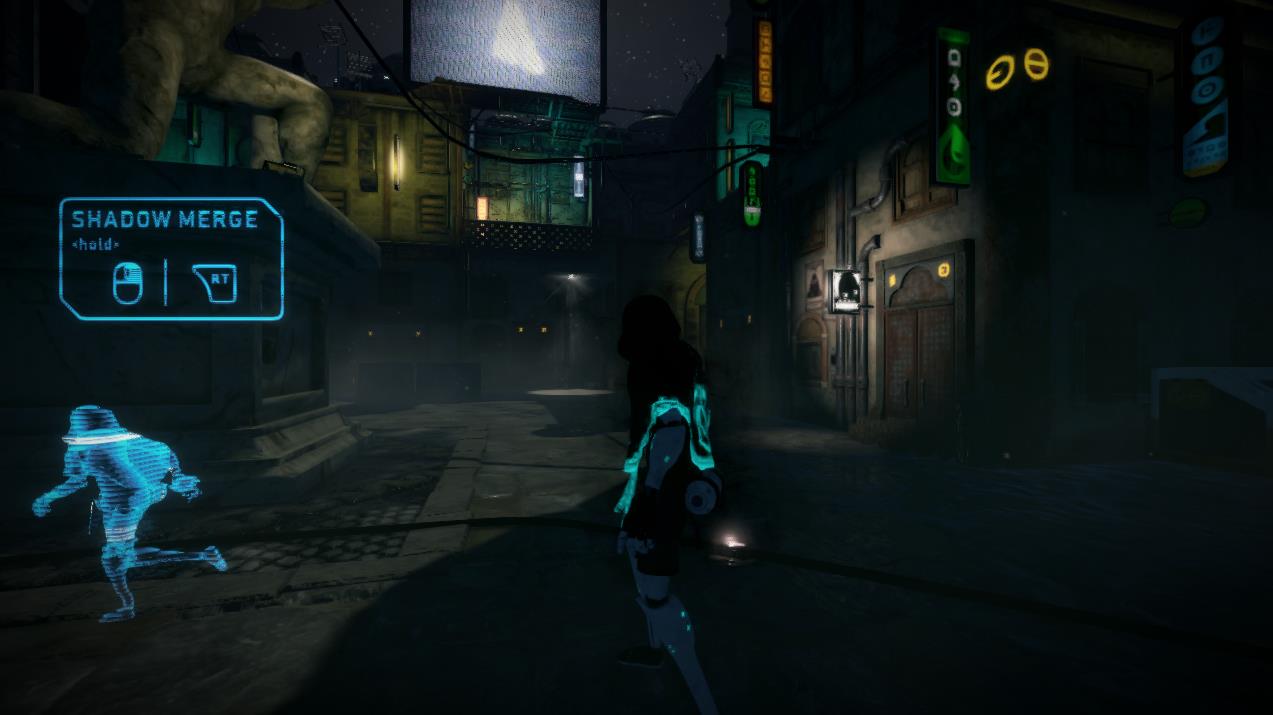
The gameplay of our game was mainly tied to the main mechanic, the shadow merge.
If the players are in a shadow, they can merge in it and move through it. This way, enemies cannot see the players. Being in shadow merge mode will consume the players’ stamina, which will eject them from the shadows if it goes down to 0.
The main mechanic, which was already developed in the first prototype we made was born inspired by two different games. From one side, we combine the movement and agility from splatoon, together with the stealth and the gadgets that you can find in metal gear solid saga.
The mechanic is very transversal and allows us to shadow merge in very different surfaces, the only limit is that the player can not stay at ceilings. As it can be seen in the following images, the player is allowed to navigate through moving shadows, moving objects, go through certain elements and easily land into shadows without being detected.
The agility of the player is a core element in the game, and all the focus on the mechanic was aimed to achieve a proper gameplay feel.
Many different gadgets and other elements are added to the game, to add a second layer of gameplay and usability to the player. The following image shows a few of them, such as the paralyzer, the binoculars, or the decoy.
In the following links, some snippets from the code of Ereban Shadow Legacy are shown:
- Shadow detection: Simple system that was in charge to manage and decide wether a point is in shadows or not. This method uses physical bounding volumes of light, with the combination of raycasting to determine if we are in shadows.
- Game State Machine: System modules and state machine architecture of the game.
- CVAR System: System to manage the different states of the game by the use of the command pattern.
Graphics Programming:
In terms of graphics programming, we have to distinguish two periods of the game. A first period based in the built-in rendering pipeline, were graphics were more cartoon, and the final version of the game, built using HDRP with a more realistic graphics.
Initial game prototype was developed under Built-in render pipeline, and all of the shaders are coded under hlsl: The results can be seen in the first video, were our first prototype of Ereban is shown.
Final game project was developed using HDRP, in this second stage some of the shaders were developed in HLSL and others with the help of the newly introduced tools such as shadergraph. In the second video, we can see our announcement trailer for the xbox showcase of 2022.
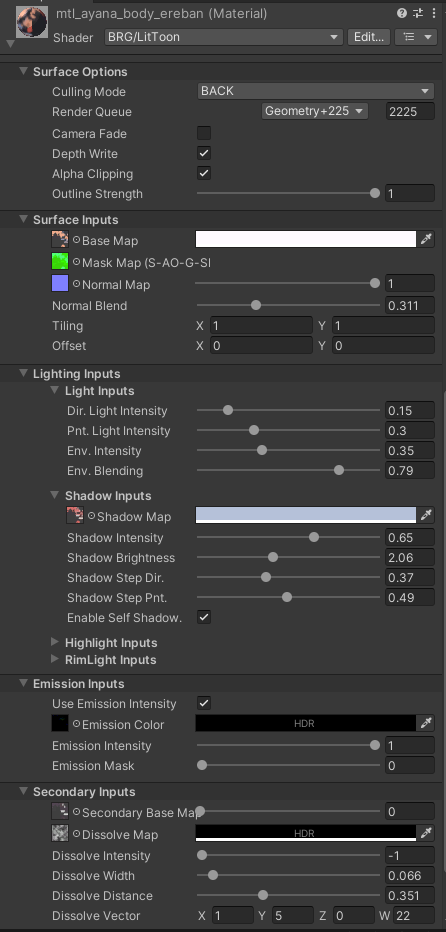
The following link is a snippet from the code of the LitToon shader.
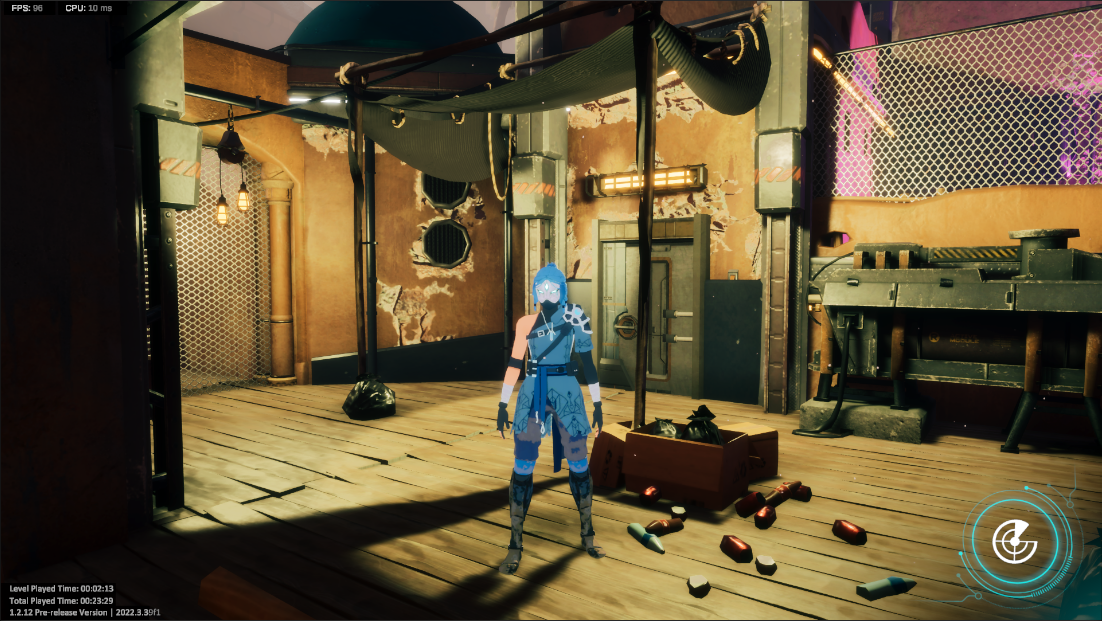
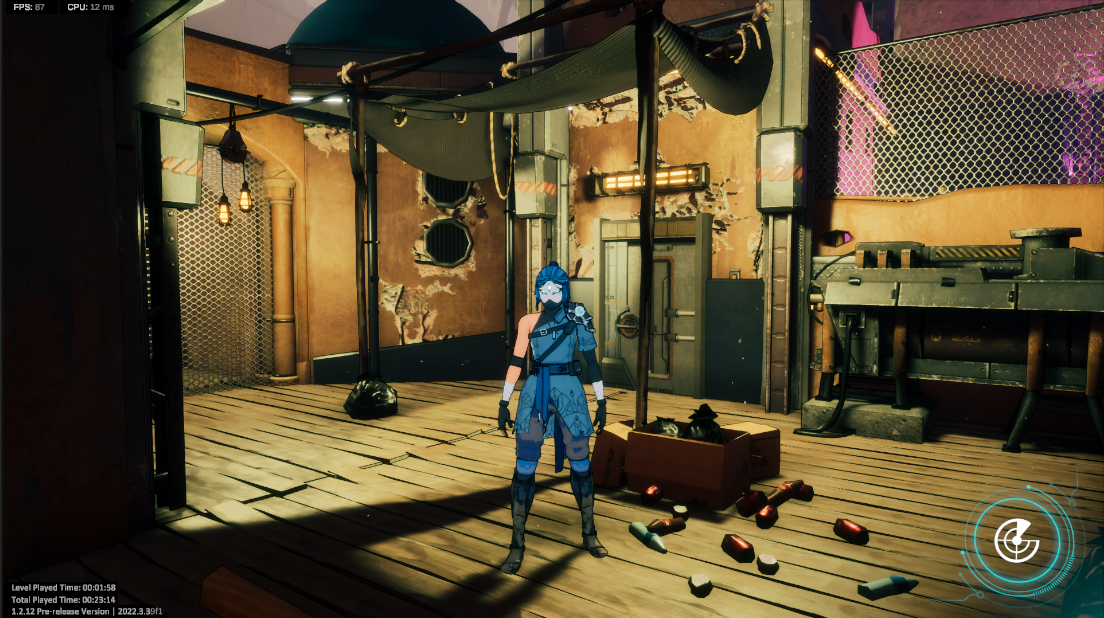
Player Dissolve, Teleport & Distortion effects The teleport effect is a little bit more complex. The procedure is similar to the dissolve, but in this case, using a pixelated texture, to give more of a digital disintegration, together with a holographic effect. Both effects are shown with a slower timescale in order to better visualize them.
Another two effects created for the Lit Toon Shader are the dissolve and teleport effects. The dissolve effect consists of a noise texture used to clip the player’s mesh in order to make it disappear or merge into the ground.
Finally, some of the enemies also feature a distortion glitch effect. These enemies use a different shader, that makes them feel almost transparent, but we control the transparency intensity with the distance, the closer you are, the less transparent the enemy is. At the same time, in order to give some feedback to the player, we created a glitch effect, so that sometimes, this enemy is easier to spot.
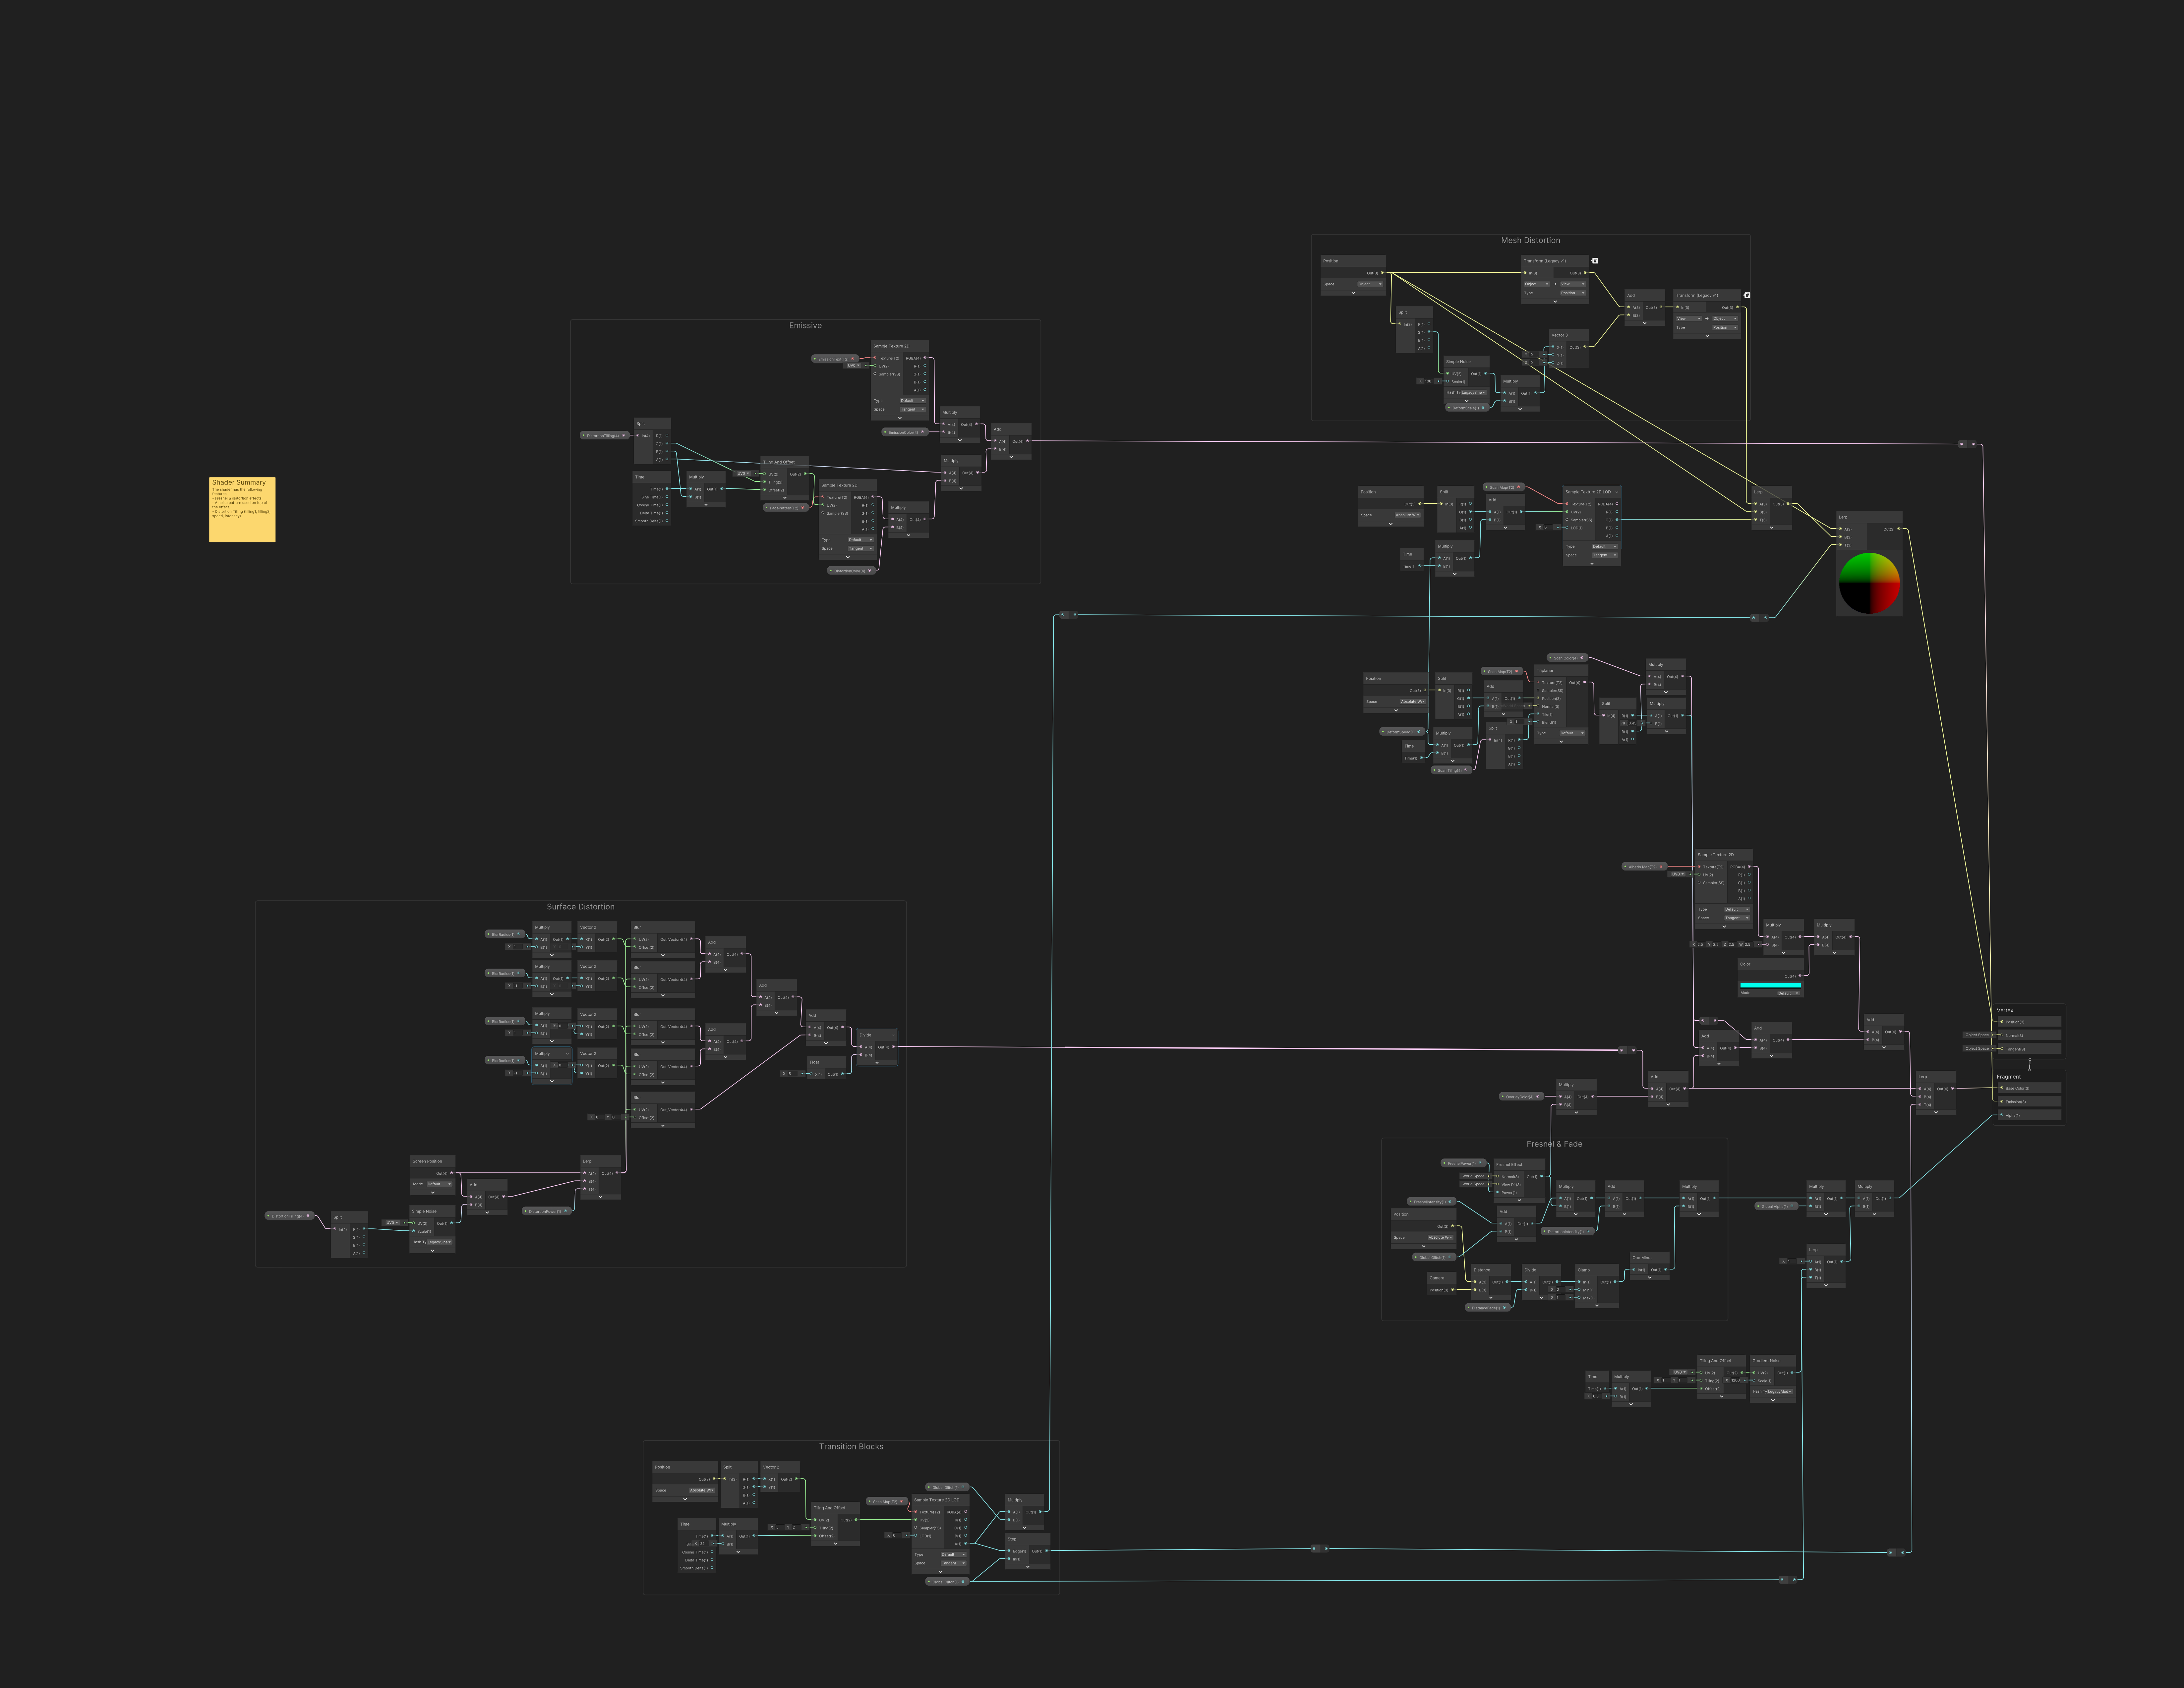
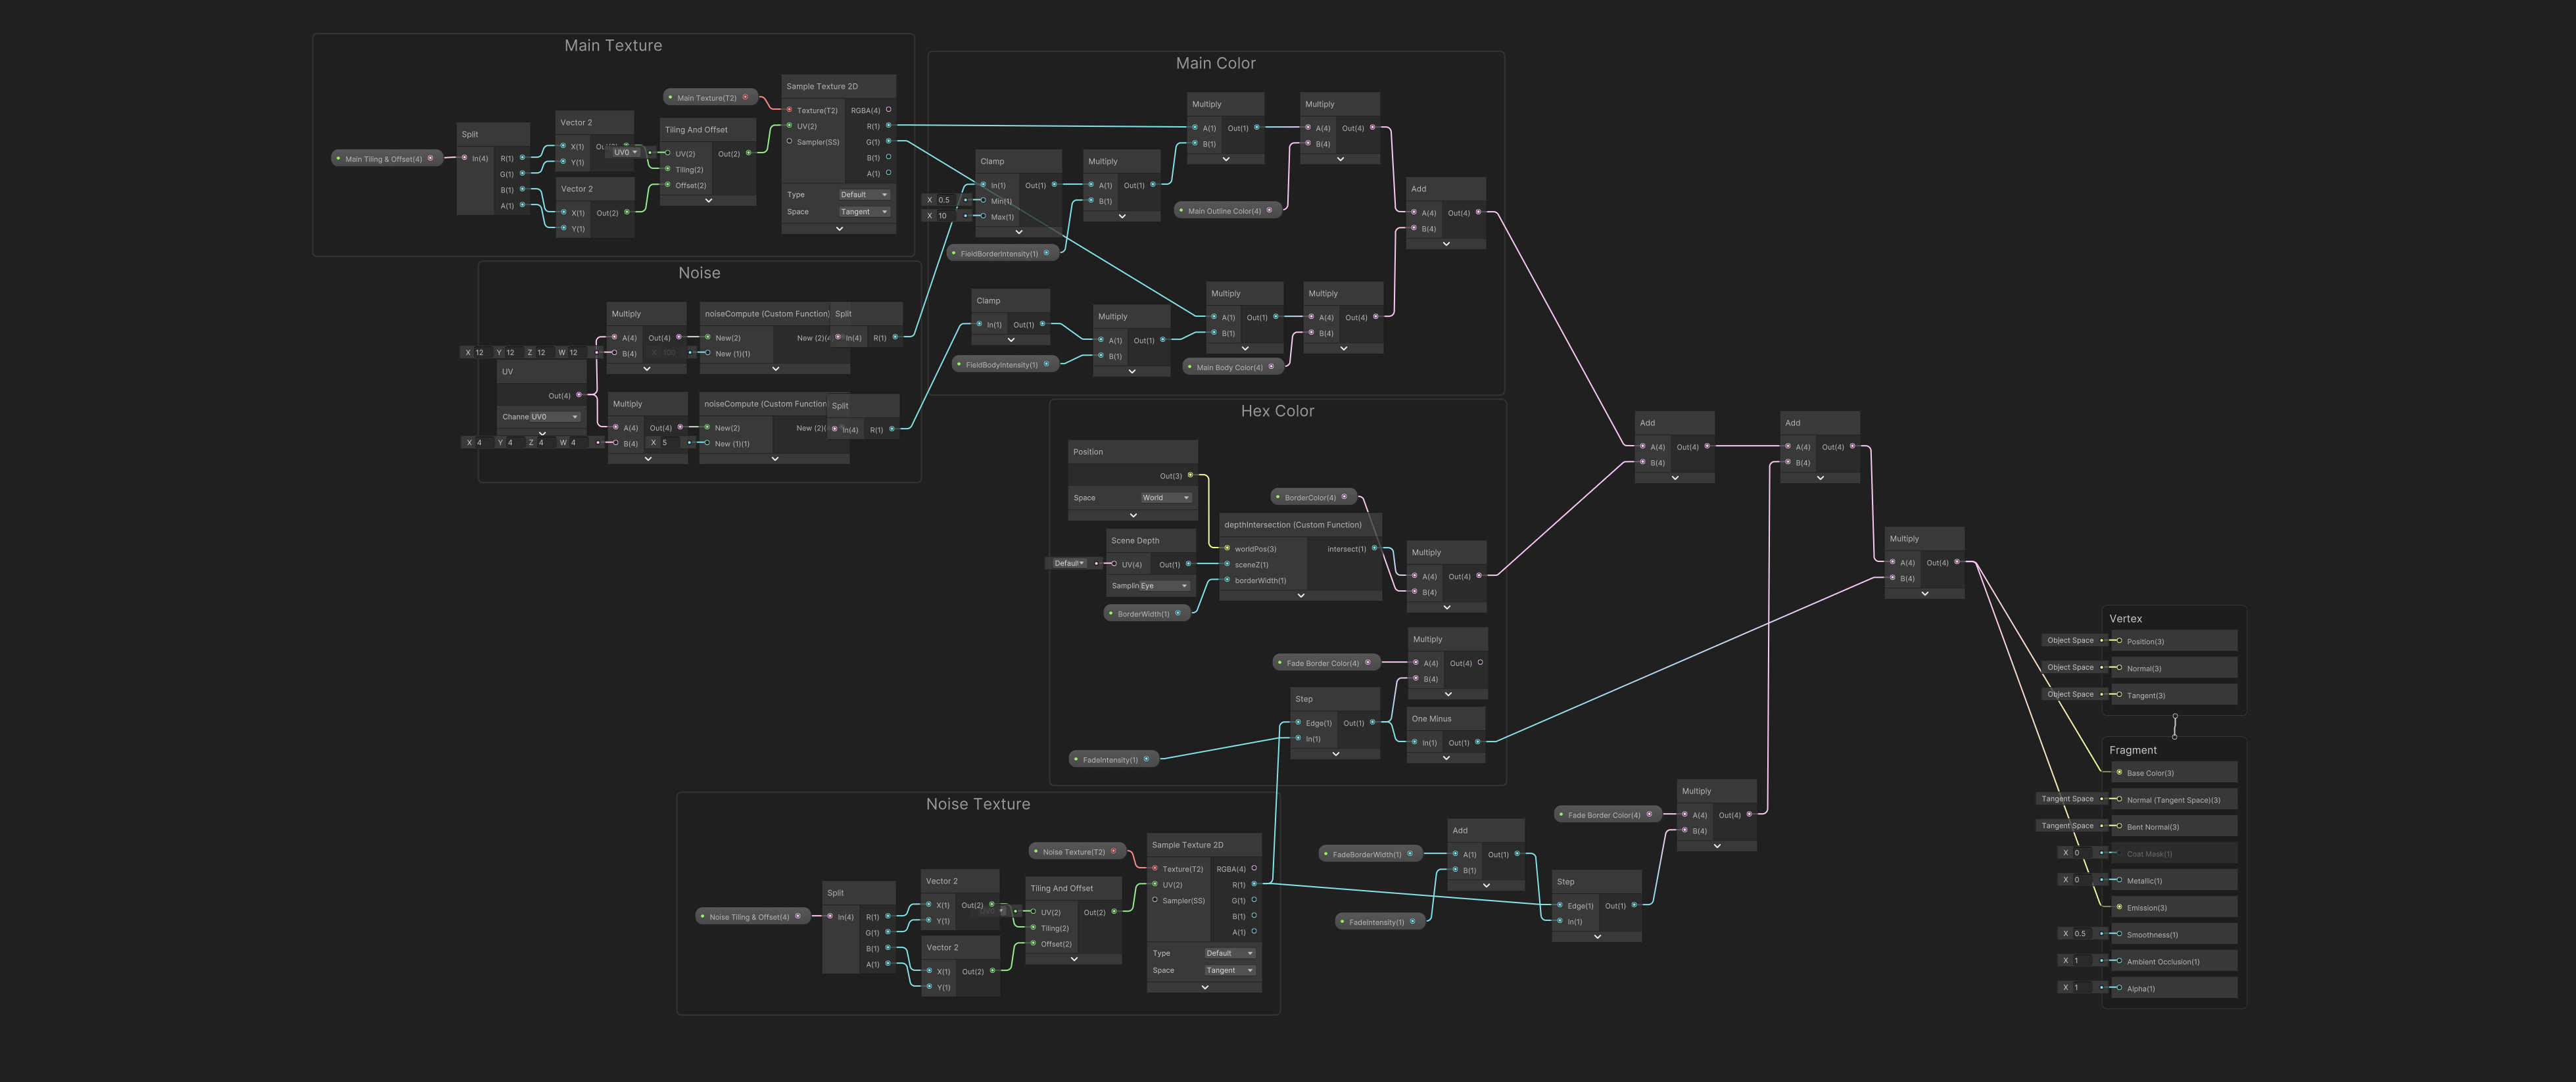
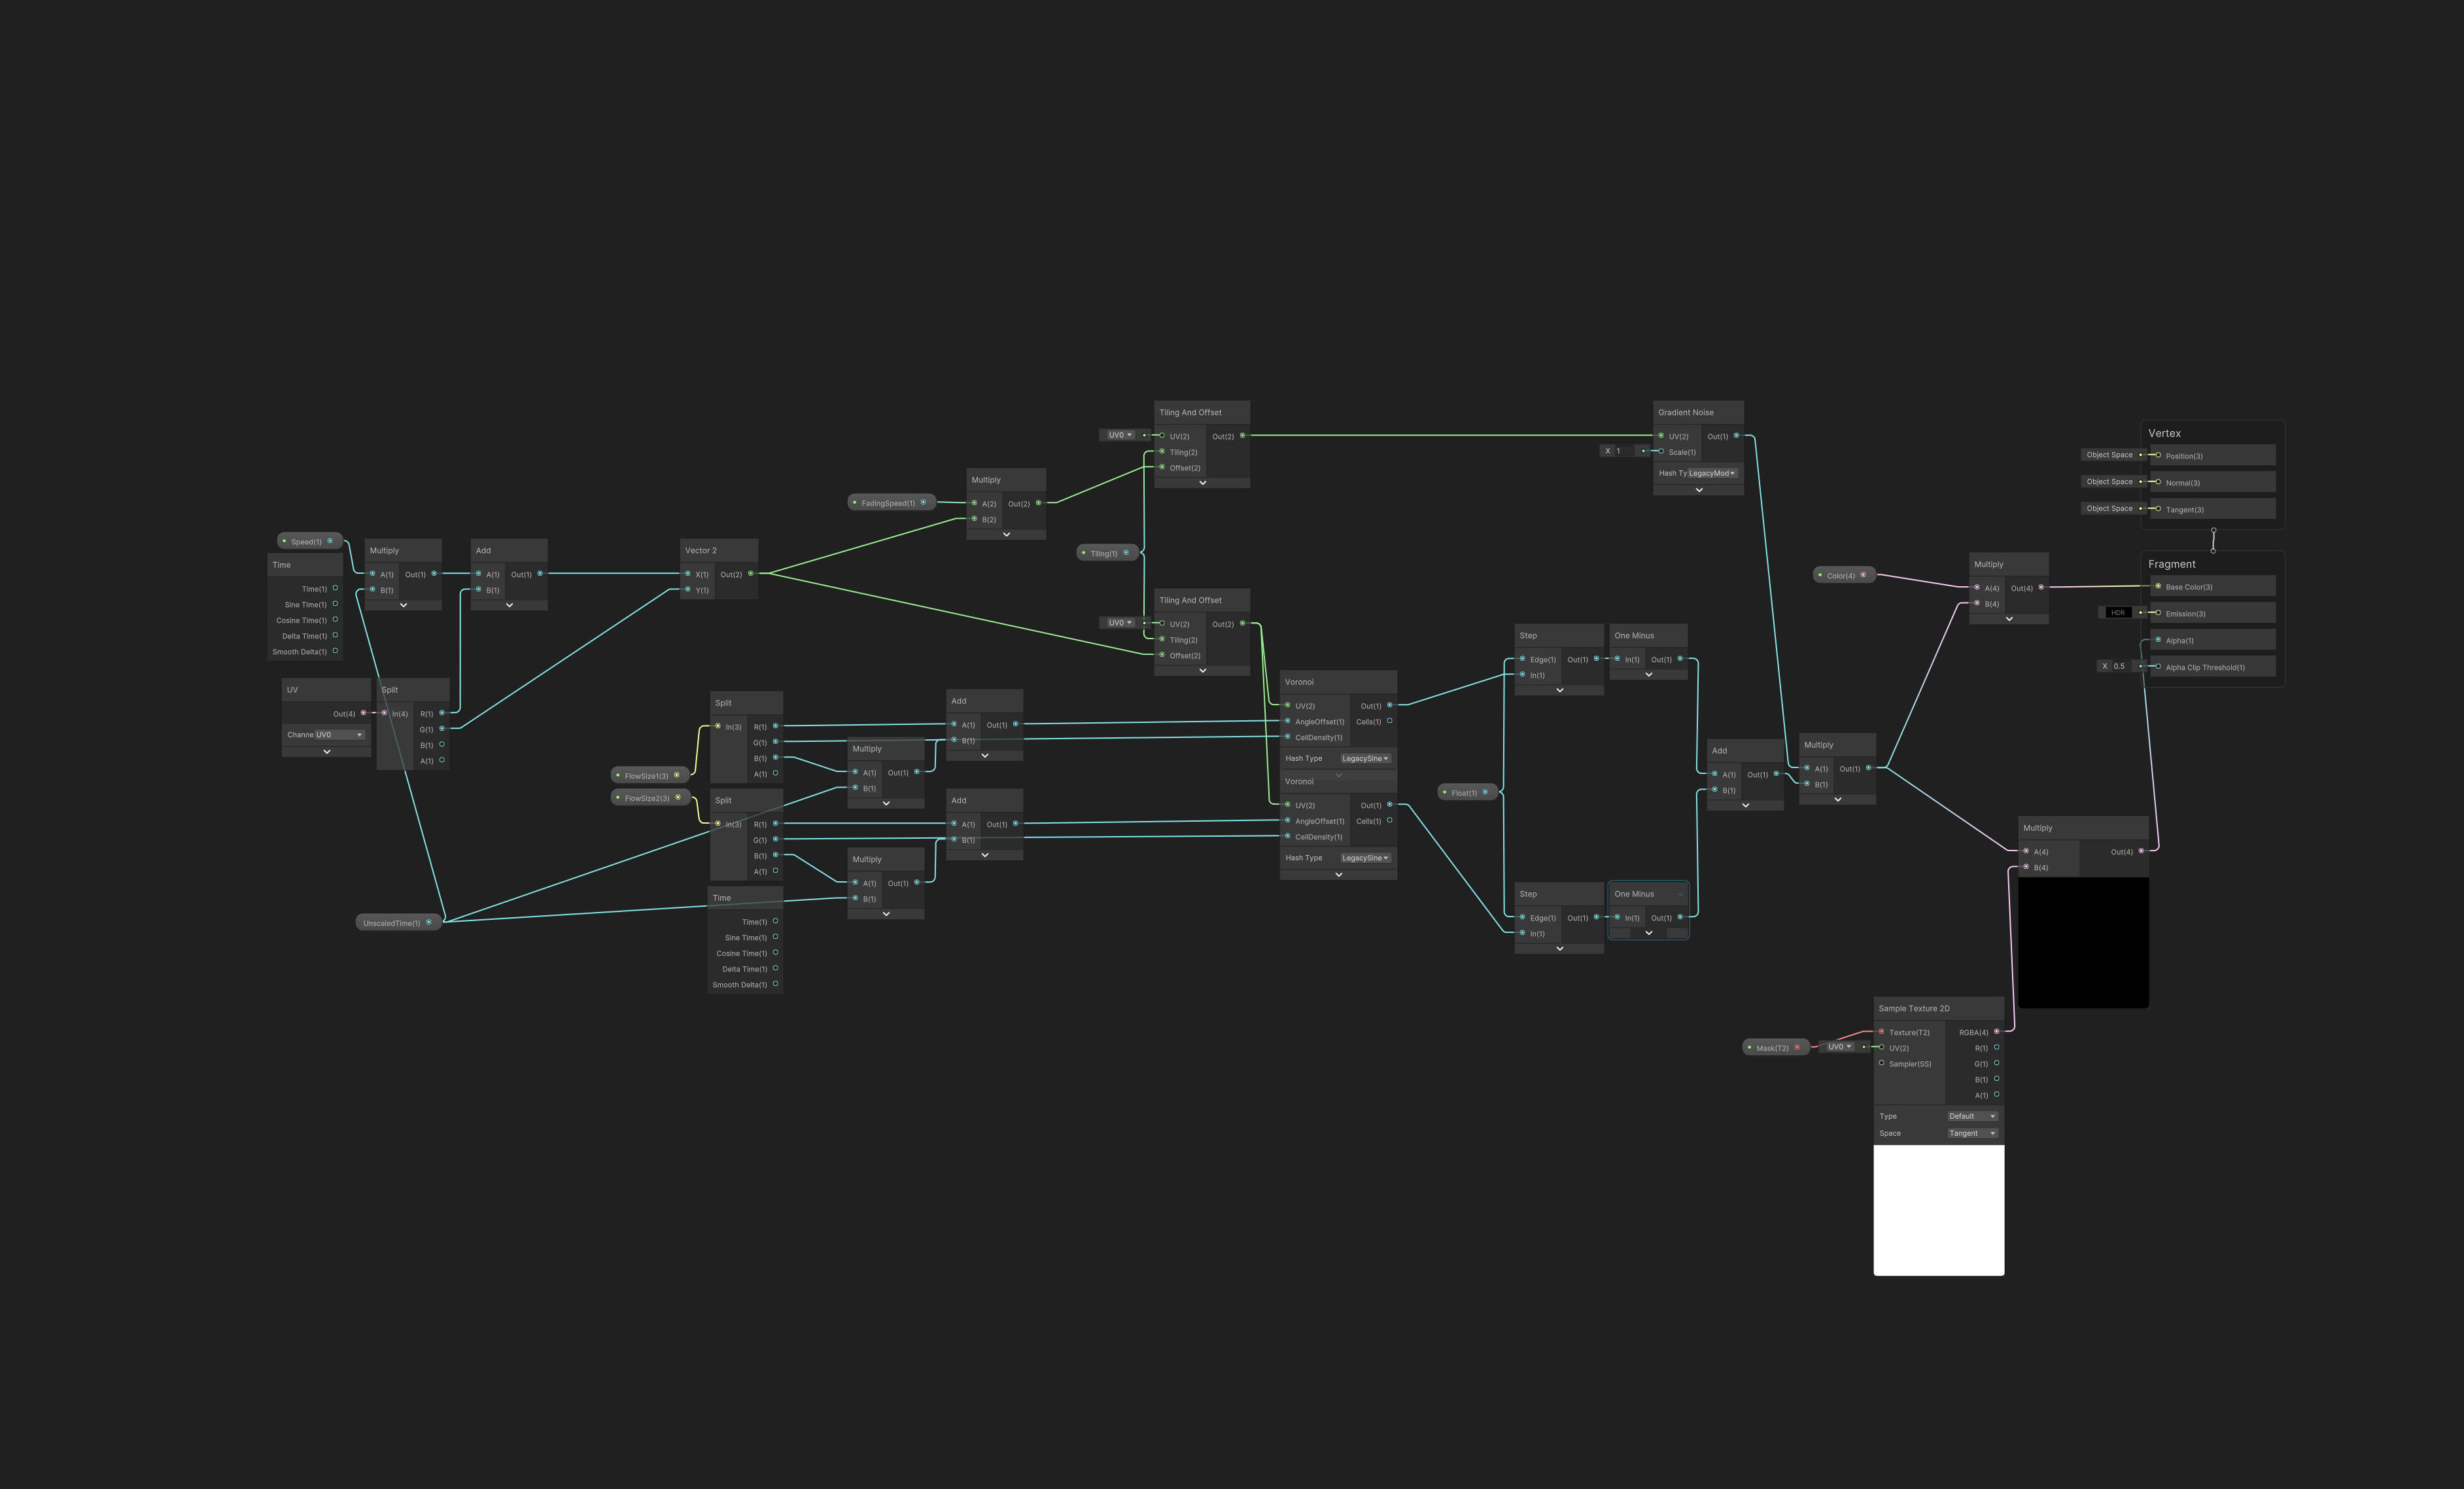
The following image, shows part of the code from the stealth effect, which belongs to a second shader implemented with shadergraph, together with the help of some HLSL custom functions. For a better understanding, inspect the image to zoom-in.
DrawMeshIndirect Foliage
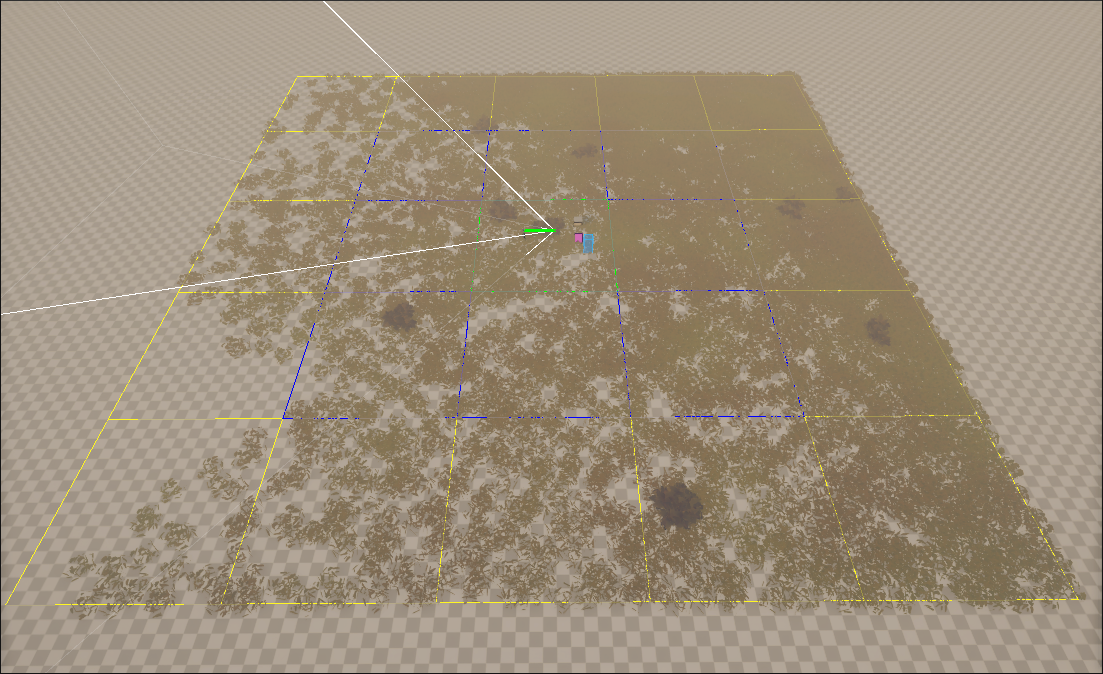
Due to the complexity of the foliage of the game, which we can count in hundred thousand instances per level, I had to implement a Chunk/Patch system to render all the grass in a more performance wise way. This patch system uses a Quadtree to determine in which chunk the camera is, and determine the rendering of neighbor patches according to it.
To avoid redoing all the foliage pass by the artist team, we conserved the current Unity terrain grass positioning, but the system automatically switches off the rendering system by Unity and uses this custom architecture we created.
The architecture collects all the grass instances by type, and generates a certain level of LODs for each chunk, so for further distances, their lower lod version is used. As seen in the following picture, different chunks are rendered.
In terms of rendering, drawmeshinstancedindirect is used to render each instance type. This allow us to draw thousands of grass instances in a single draw call, each one of them with its own mesh information with the help of structured buffers within compute shaders. The following code samples show a part of how the system works.
In the previous video, we can see how the different chunks of grass pop, done on purpose to show how the different lod chunks appear when the system working. A fade effect was later added to reduce this effect.
The following LINK is a snippet from the code of the foliage instancing, both scripting and shader.
Also, together with the previous code, a shadergraph was implemented, in order to do the soft part of the rendering, which is the actual lighting of the foliage, as shown in the following image.
The system dramatically reduced 2ms of render time to 0.15ms.
Misc: Capsule Instanced Shader
We needed to render a high amount of drone capsules, with different setup on their helix and different movement. To do so used shaders in order to control the rotation of the helix and the spinning fan. The same shader is applied to every drone, which, with instancing, you can control these parameters and make the illusion of many different capsules but being rendered at the same time. In the first picture, we can see how the different parts of the helix, are painted with different vertex colors, in order to control them individually.
The given video, shows the drones at work, with the shadergraph sample provided below. To do the proper movement of the capsules around the world, a spline script was used:

Misc: Plasma Tubes
The plasma tubes are a combination of effects, one shader to control the liquid of the tube itself and a series of vfx to give the live effect of bubbling water.
Misc: Barrier
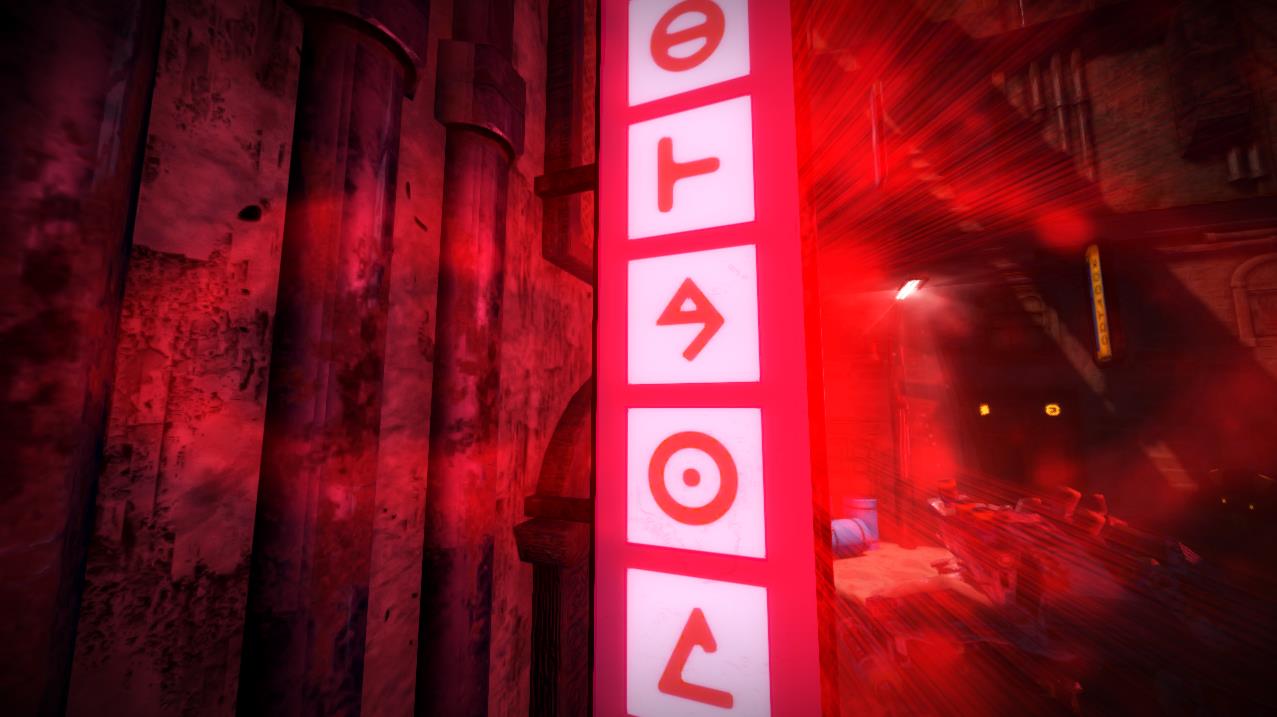
The barrier shader is a standard plasma shader used to block the way to the player, as an affordance. The shader consists on two textures, one used as a main albedo, which consists in the stripes we can clearly see, and a second texture, a mask which is used to generate the noise when the barrier is opened.
Misc: Footsteps
To generate footsteps for the player and all the npcs present in the game, the vfx graph system was used. This system uses the gpu to instantiate dozens of projected decals with a minimal cost.
Misc: Others
The following LINK contains a series of shaders from old built-in pipeline from the early versions of the project.
POST PROCESSING EFFECTS
Edge Detection
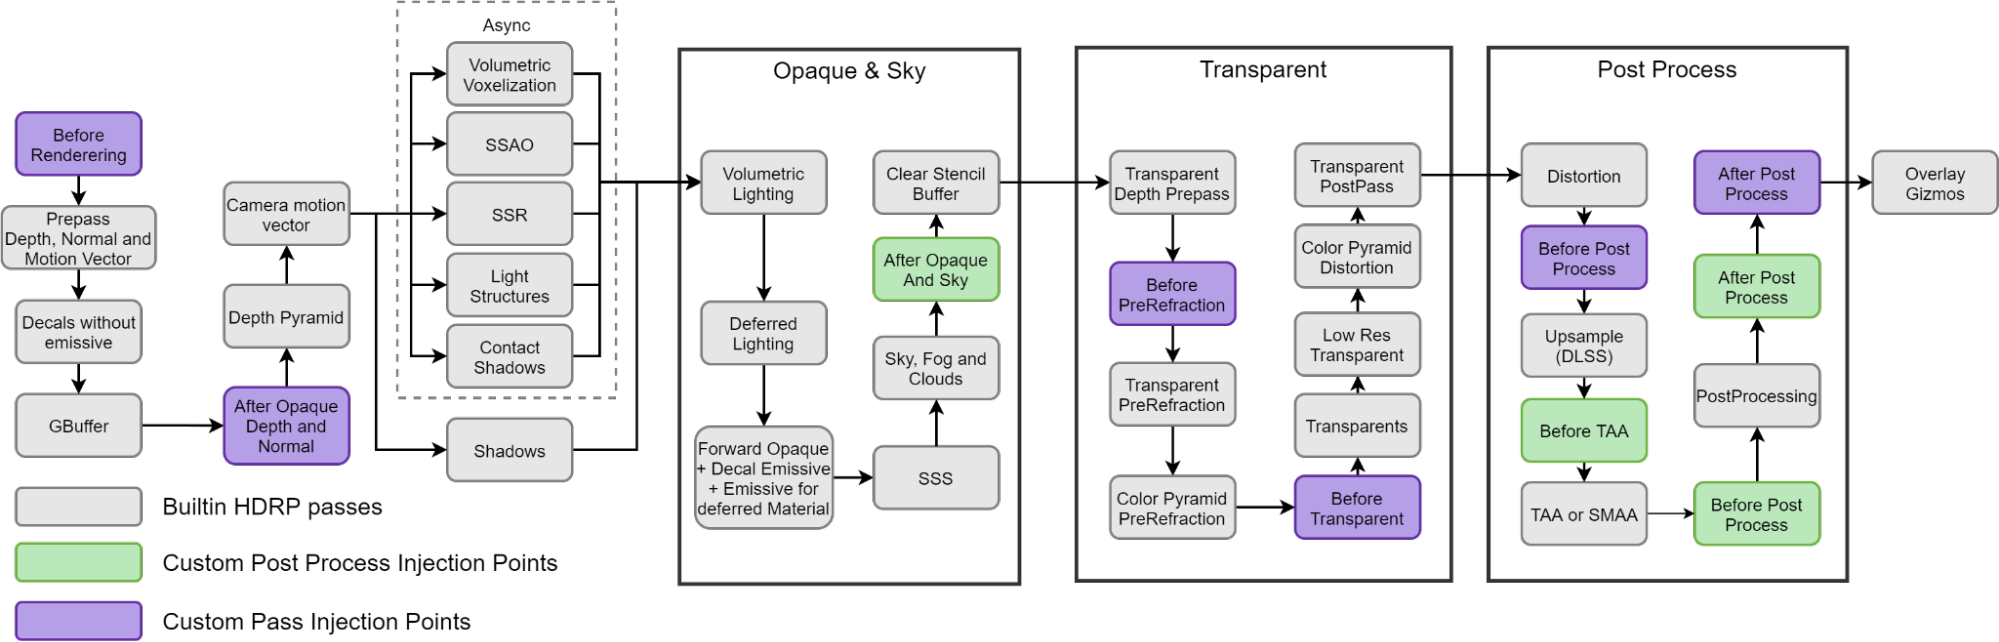
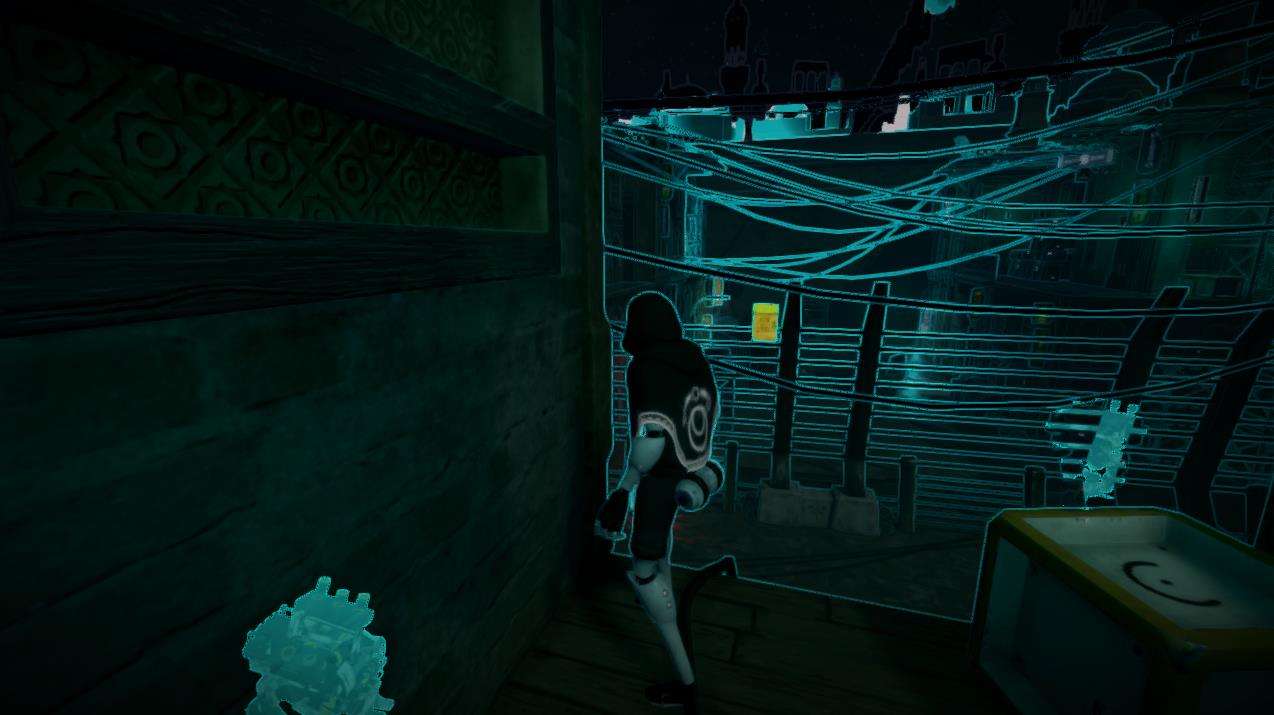
The edge detection in our game, is created as a post processing effect. Using other methods to generate an outline shape for an entire 3d environment is very costly compared to a fullscreen effect that uses the normal buffer, in order to determine wether an outline should be drawn or not. The following image shows the difference between having and not having an outline in the game.
One of the main challenges of the edge detection method was to not write the line in front of any volumetric light. Due to the nature of the HDRP workflow, this turns out to be a difficult task, since the volumetric buffer is written in a very early stage of the pipeline. To solve this problem, a read to the VBuffer is done in order to reduce the intensity of the outline depending on the values from the buffer.
The following LINK contains the snippet code from the edge detection, both shader and scripts.
Sonar Wave
The sonar wave effect, inspired from the sonar effect of metal gear solid, is a postprocessing effect used as a mechanic where a sonar pulse is thrown from the player position and reveals enemies and mission objects. The shader uses a mask and the depth buffer to traverse a wave through the scene. On the other side, an outline mask is generated using a cpu script that iterates through the target objects and detects whether the wave has reached each object or not.

The following LINK contains the snippet code from the sonar wave effect, both shader and scripts.
Shadow Powers
The shadow powers is a post processing effect added in the screen that is used when Ayana is merged in the shadows. The idea behind the effect is that give a shadow blending feeling to the player while using the main mechanic. In the following image, we can see how this effect, which consist of a mask an a random noise, with a final touch of chromatic aberration.
The following LINK contains the snippet code from the shadow powers effect, both shader and scripts.
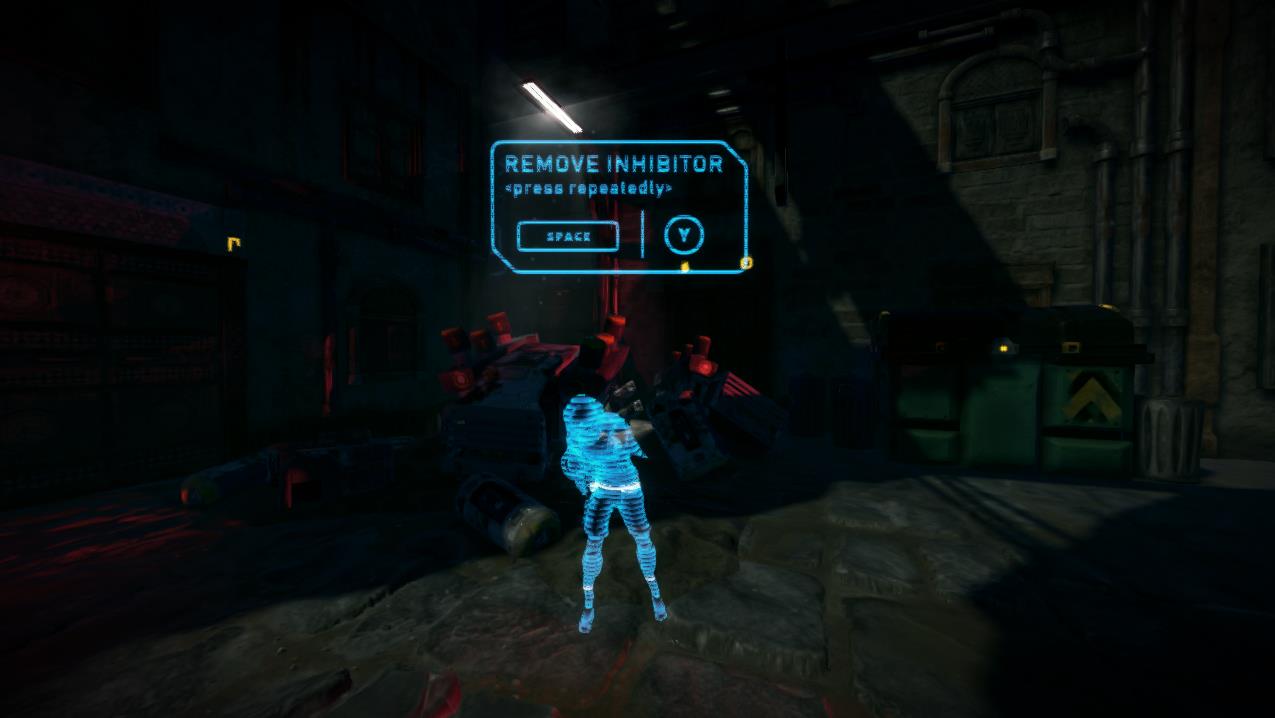
Digital Glitch
One of the mechanics used by the enemies of Ayana, is the inhibitor. The inhibitor is a nonlethal weapon that enemies shoot at Ayana in order to block her from using his shadow powers. To give feedback to the player that Ayana is inhibited, a post processing glitch effect was created. This effect can be seen in the following image.
It consists of a pixelated mask randomly used along the screen and a glitch distortion effect.
The following LINK contains the snippet code from the digital glitch effect, both shader and scripts.
UI Dust Glow
We wanted to make our UI alive. To do so, in this case, I created a glow dust effect, which can be seen in the following image. It is exaggerated to be better seen. Part of the shader, is shown in the following shadergraph, which together with some parts of custom hlsl functions, generates the effect.
VFX
I wasn’t in charge of the creation of the particles for the game, but I made a few systems which were finally included in the final build. A few them are shown:
Helios Sun VFX
The sun is a key core in the narrative of the game, as it represents a dyson semisphere, the energy source from helios. I represented this sun as a particle. The sun effect is a vfx graph particle which consist in millions of billboards, dots, which are run in the gpu.
Spline Rat VFX
The rats FX is a vfx graph particle which we used to give some dynamism and realism to our static scenes. The vfx consist of a mesh that is moved along an spline using vfx graph. At the same time, rats are using a custom shader I made, which uses the vertex position of the rats to make them bounce.
Point Cache VFX
In order to render millions of particle instance at the same, the GPU must be used. In our case, many of our particles were initially created using the old Shuriken system. To improve the final performance of the game, most of these particles were ported to the newer VFX Graph. The following image, shows dozens of particles at the same time with almost no cost at our most density complex level.

In order to do so, we use the point cache method, which together with a texture2d that is used as positional data, allow us to place thousands of particle instances with almost no cost. To achieve this, I created a custom property binder, which is used to retrieve all particles in the scene, disable them, and generate the texture2d which is used as positional input in our vfx graph.
Tools Programming
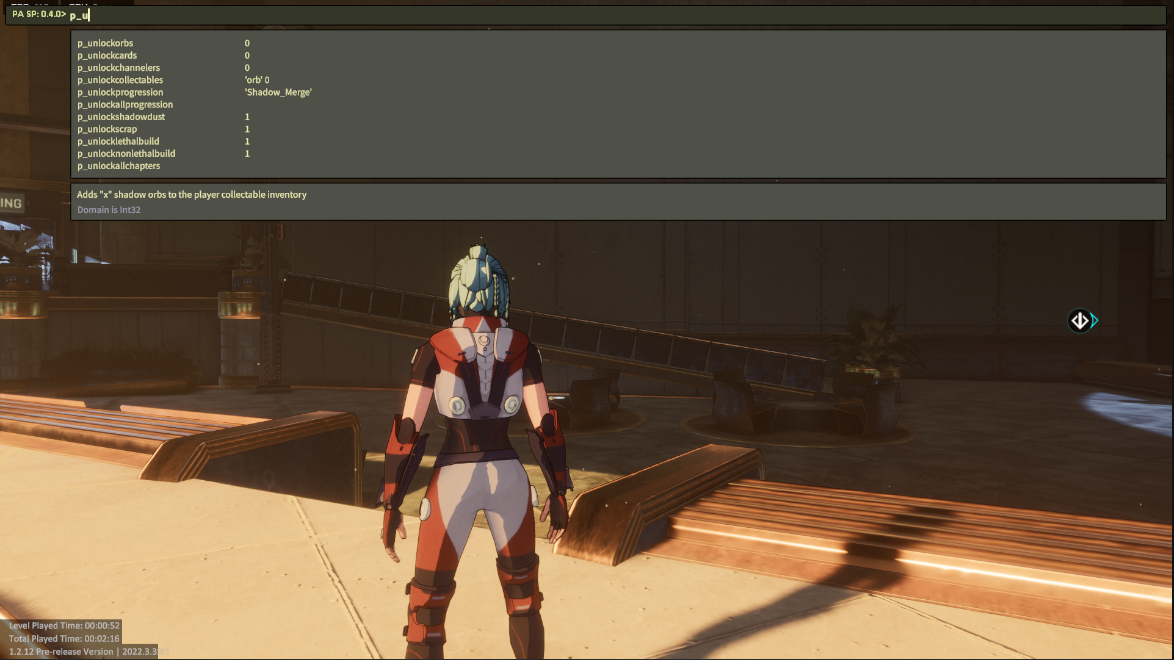
Console Commands
In our game, as many other games has a command console system. The command console system allow us to quickly debug and setup game parameters by using player input. The same system is used to hold the configuration options from the game, which are later displayed by the UI in a more user friendly way.
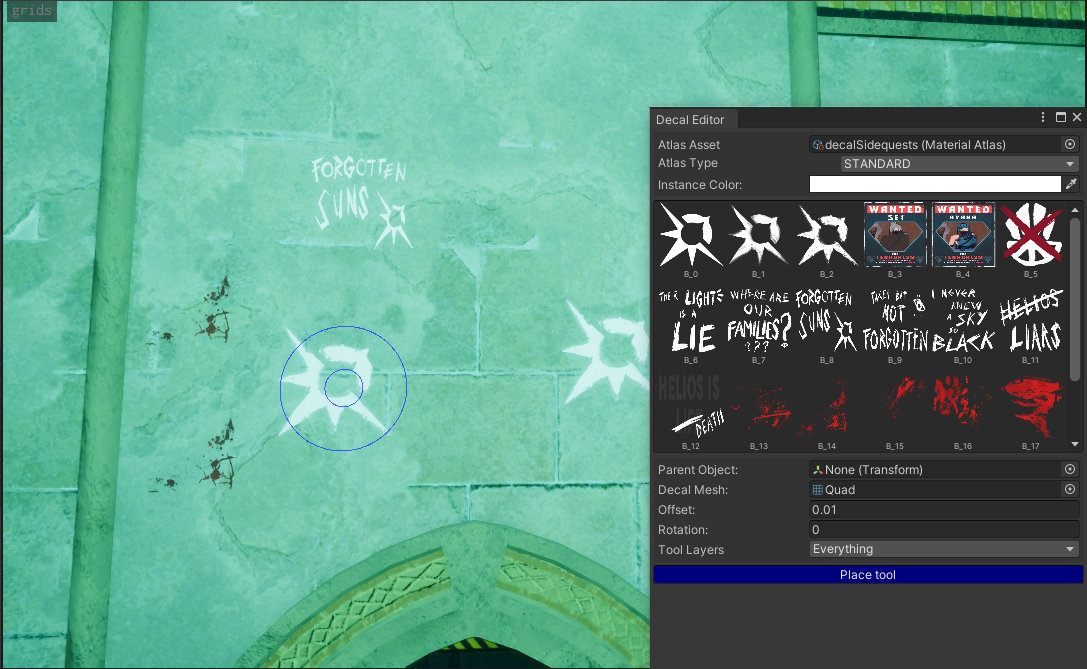
Decal Editor
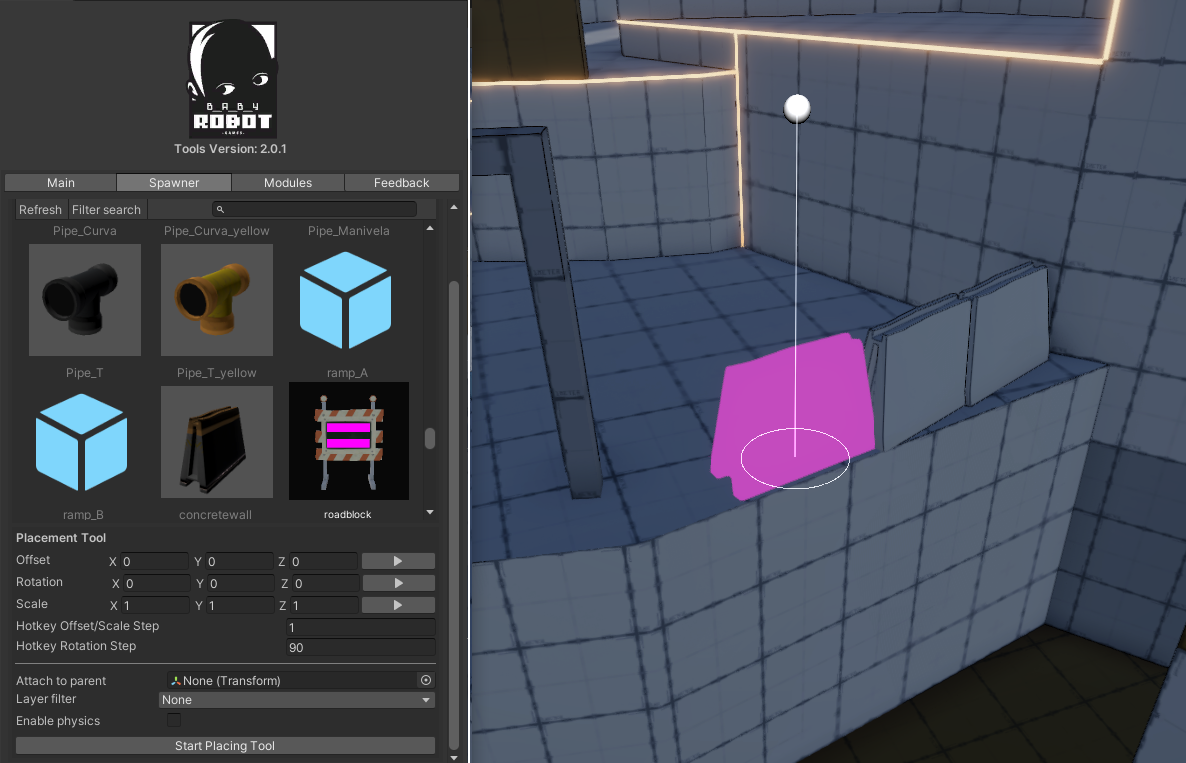
The decal editor is a powerful tool created with the aim of simplifying the process of adding decals to the game and improving the overall performance. In this case, two types of decals can be created, simple quad based decals, and projector decals. The tool also allows us to quickly select the decal we want among the list, and place it in the scene using the placement tool, which casts position targets against scene geometry and allows to place the decal milimetrically to the position we want. The projector decal shader uses de D-buffer from HDRP but with slight modifications to avoid performance related issues that causes instancing to break on default HDRP systems.
The following LINK contains the snippet code from the decal editor, both shader and scripts.
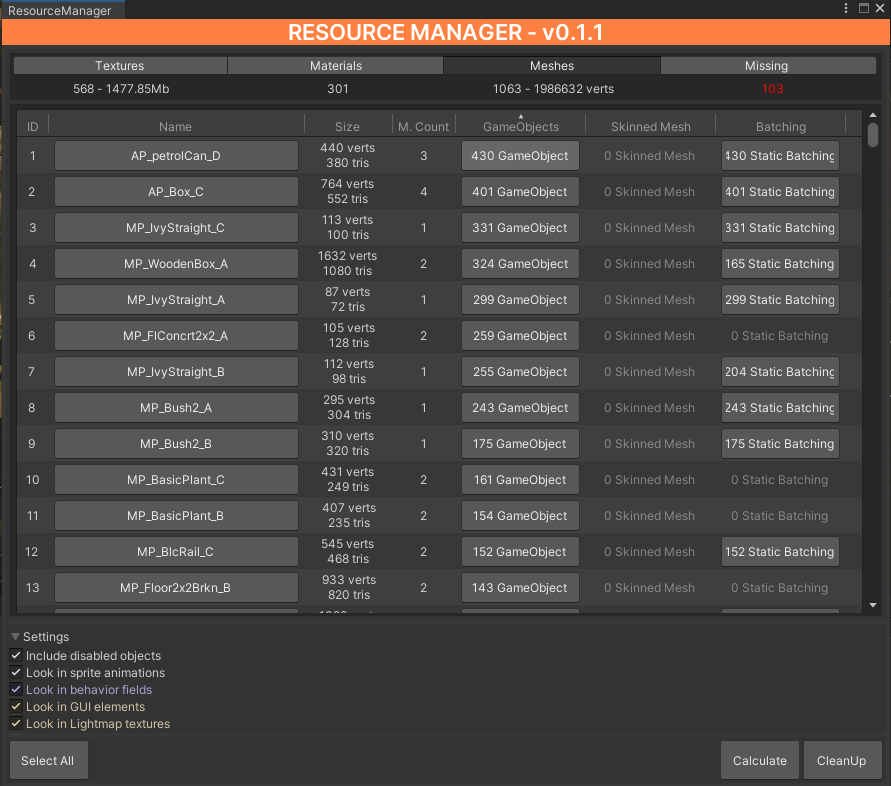
Resource Manager
The resources manager is a tool that allow us to determine which meshes are being overused, which textures are too big, which materials are unnecessary. The process of using the tool is very simple. In editor mode, press Calculate, in order to process all the information from the scene. Once done, the table will be filled with the information of the asset data. We have to consider four columns of the tool. → Textures: Identifies each texture being used, size, and number of materials and gameobjects being used. → Materials: Identifies each material in use, its shader and number of gameobjects. → Meshes: Identifies each mesh being used, its size and number of gameobjects and batches involved. → Missing: Identifies all objects with missing information. These should be repaired or removed. In general terms, the tool allows us to order by number of game objects, by size, number of static batches and all the different objects present in the scene. With this tool the process of reducing mesh materials and identifying meshes that can be batched together should be easier, as to identify those objects, or materials that are not used wisely.
Prefab Spawner
The spawner module is a tool that was created with the aim to help the artist to place objects such as props in the scene in a faster way.
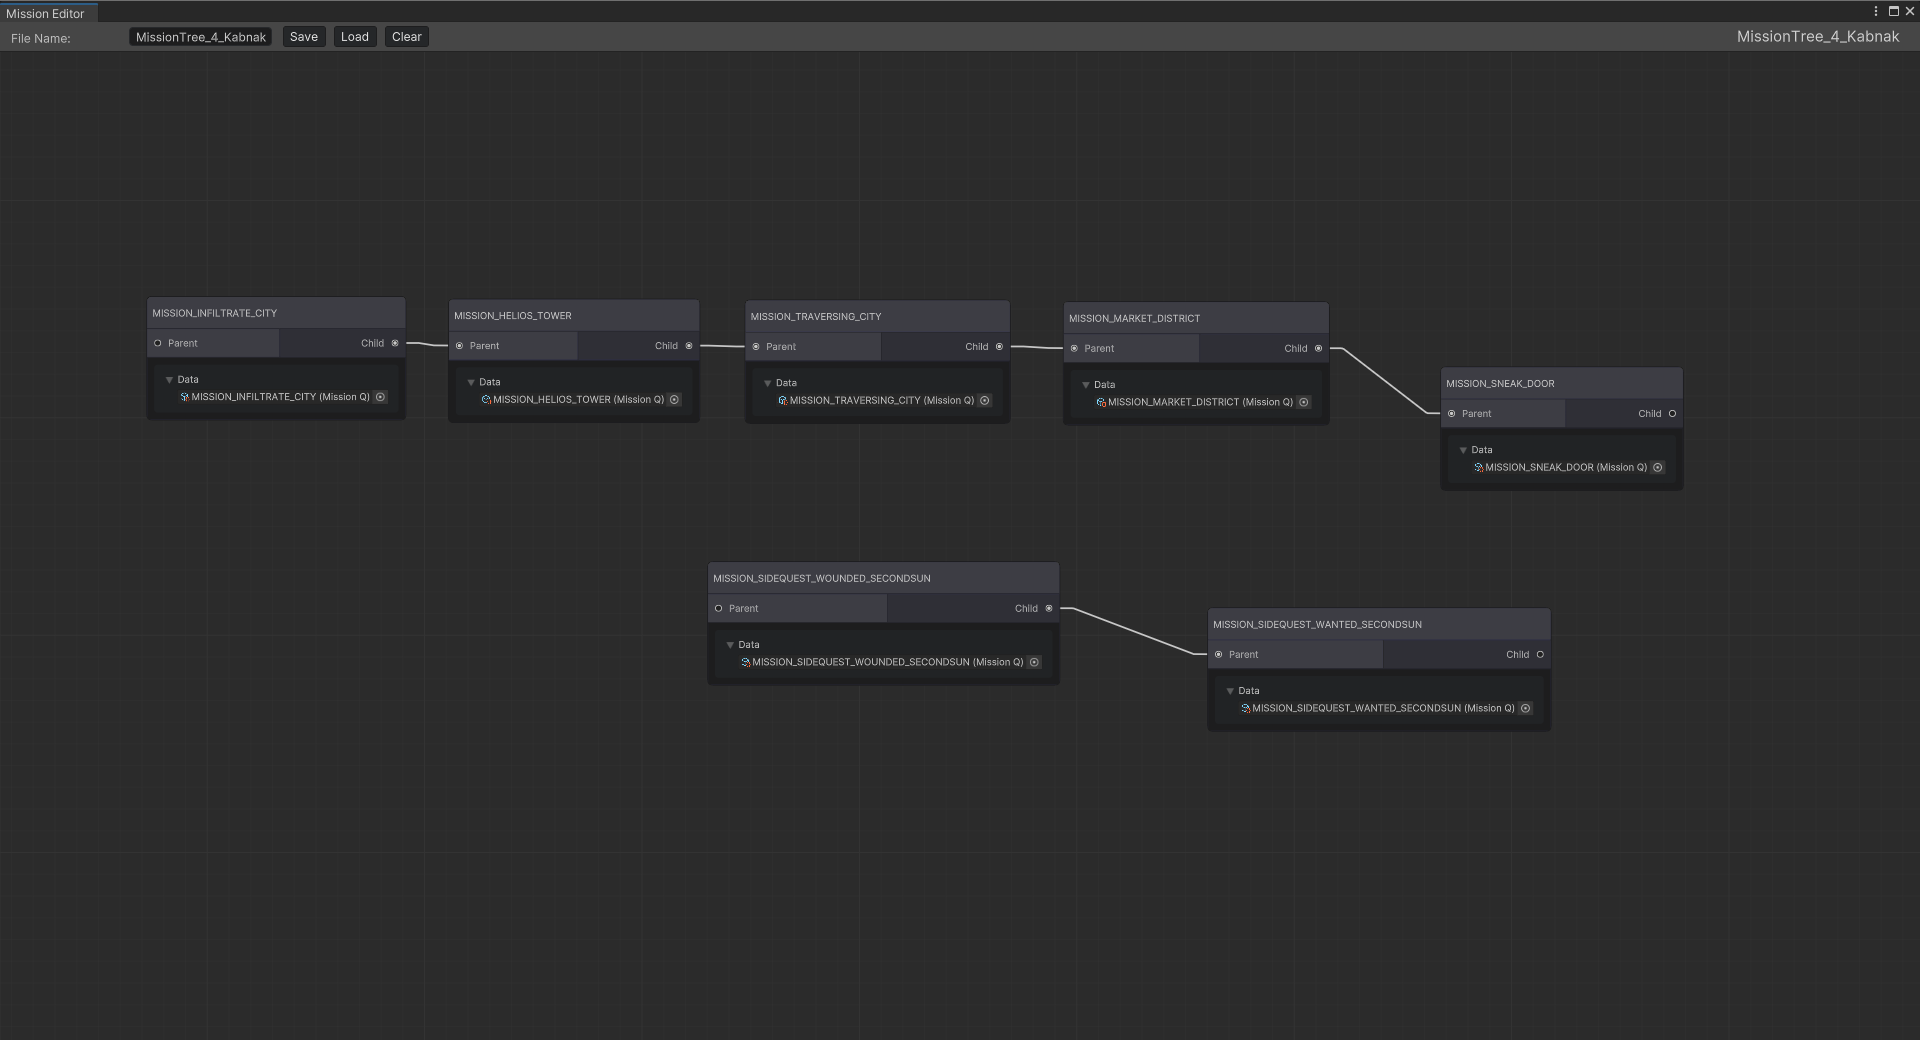
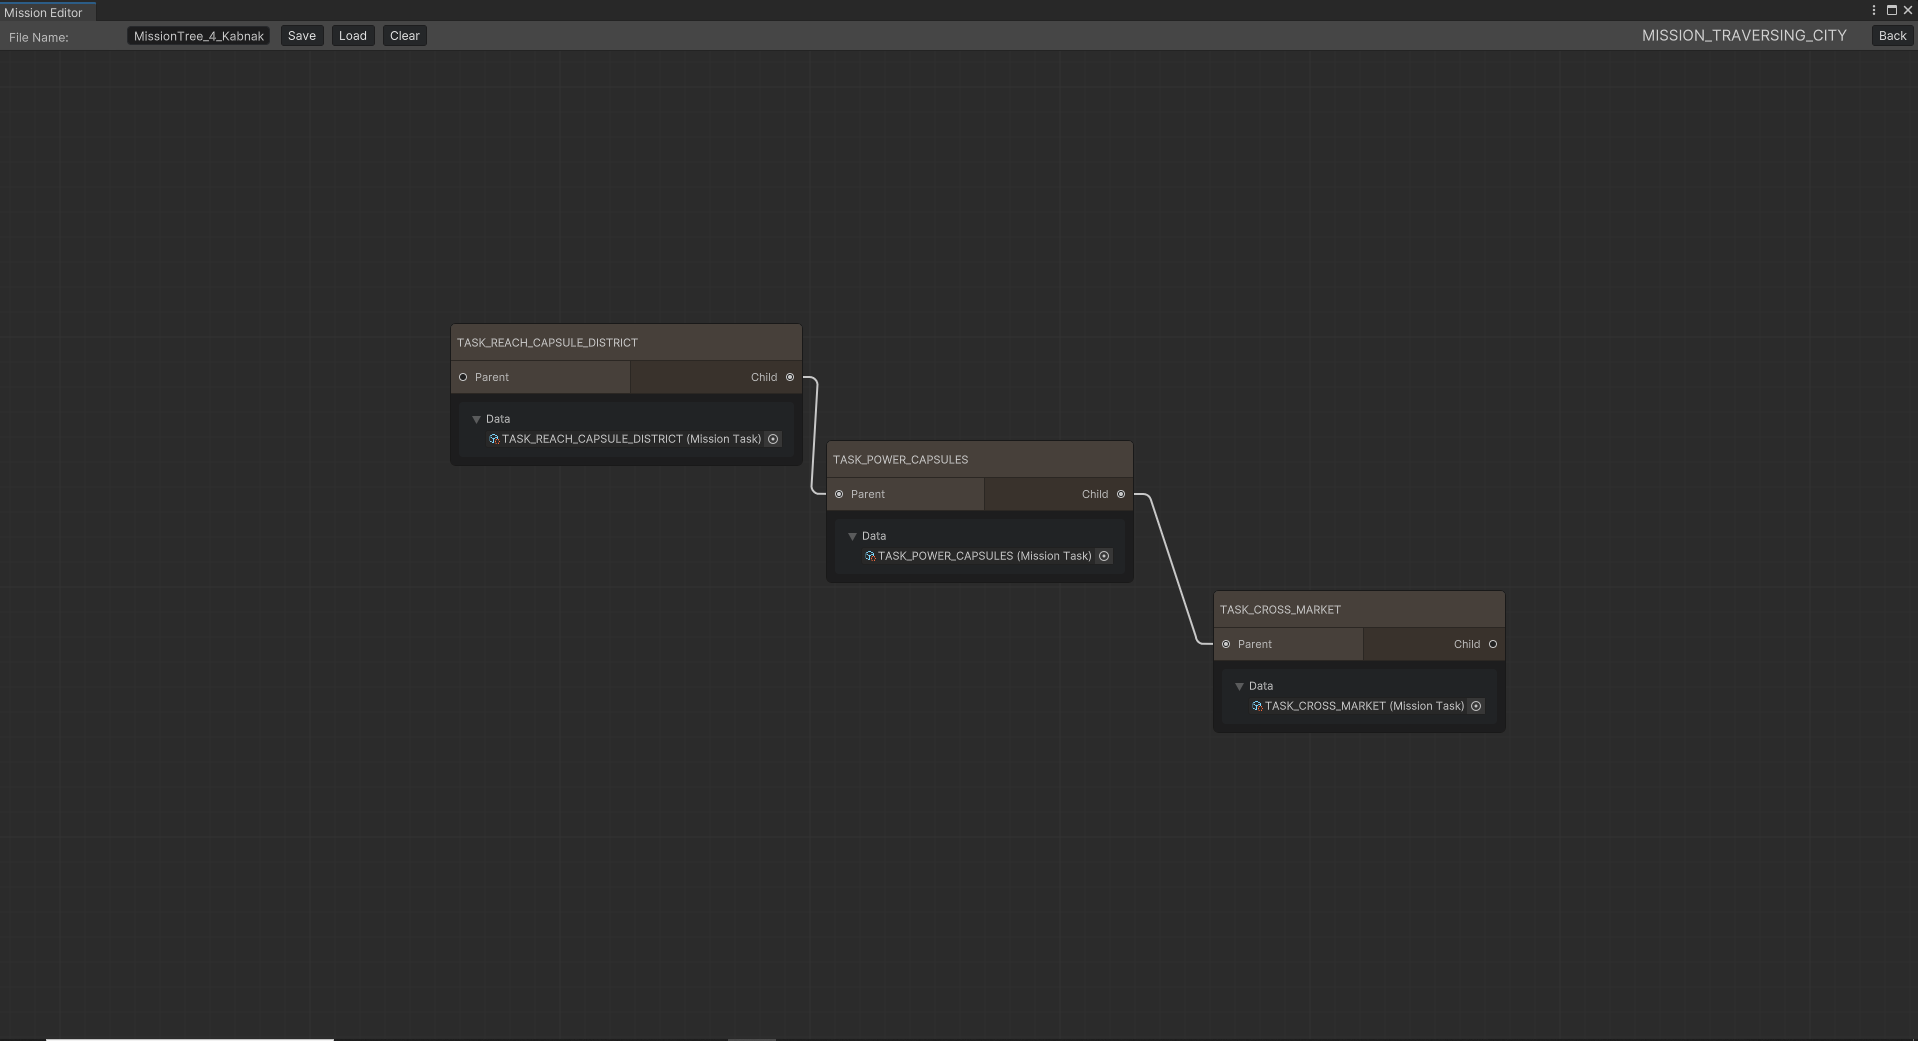
Mission Editor
The mission system is an standalone system that allow us to create missions and its tasks in order to reach/complete objectives within the game. The system is composed of mission Trees, which contain missions, and these missions contain tasks within them. The following blueprint editor was created in order to iterate through the content and develop the missions architecture in the final game.
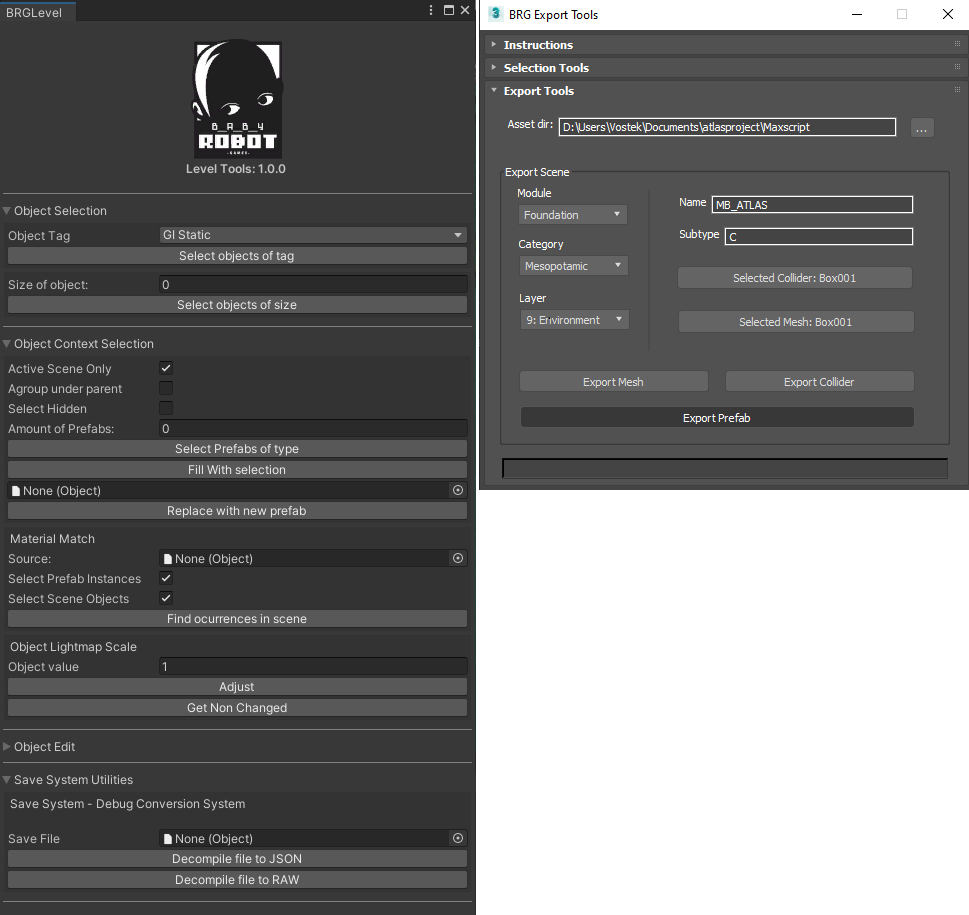
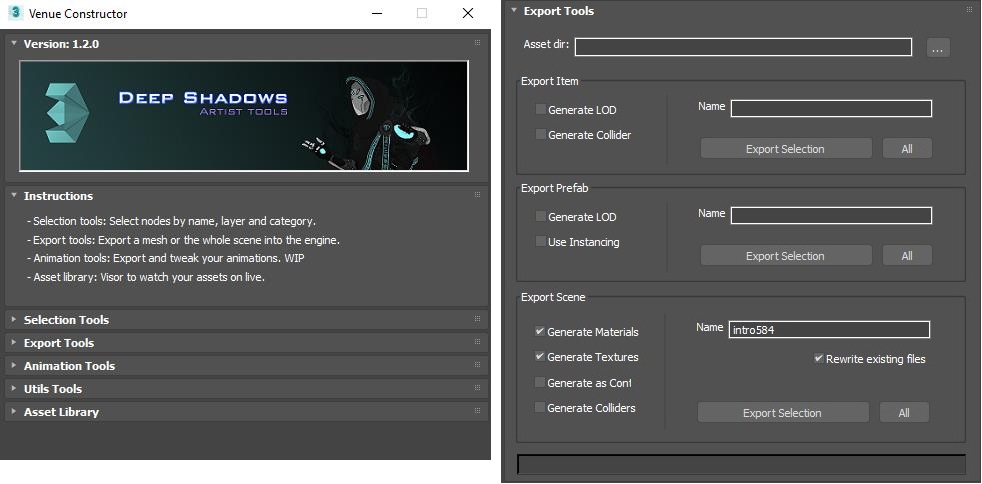
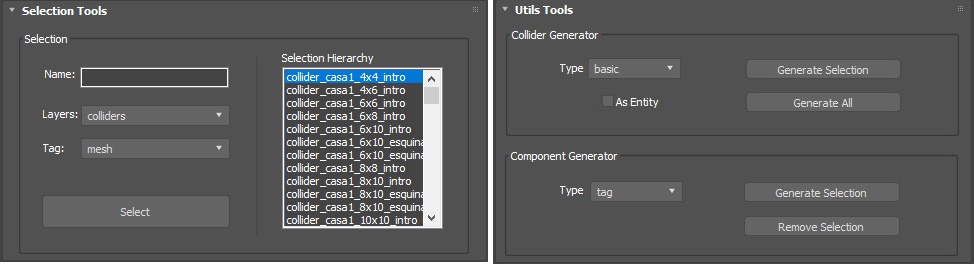
Export Tools
The export tools are a series of Tools created in 3DSMax and Unity in order to precisely import objects into Unity in a fast and safe way, meeting all the requirements from the project.
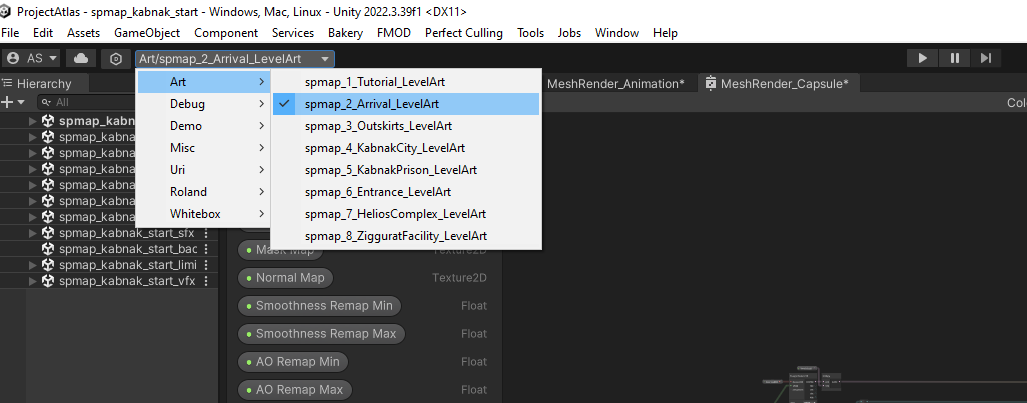
Quick Access Level Tool
The quick access tool is a menu tab added to Unity, in order to load our set of custom additives scenes that belong to a level. This tool allows us to iterate faster when switching between levels.
Performance
TO-DO
Atlas Fate: Between light & darkness
Engine:Custom (DirectX)
Languages: C++, HLSL, MaxScript, Python
Tools: FMOD, Cal3D, ImGUI, Renderdoc, Nvidia Nsight
Atlas fate is a custom engine project that served as a base for the future Ereban game. The game engine is coded from scratch using DirectX API, together with the PhysX engine, FMOD, LUA and CAL3D for animations.
The engine features a deferred renderer, a custom particle system, custom volumetric lighting among other state of the art features for the year it was developed.
I was the lead programmer for the project. I was in charge of graphics, gameplay, physics and tools programming, and also involved in design tasks.
Gameplay Programming:
The following videos belong to the final launch trailer of the game and a gameplay video.
The following image shows how the development of the game evolved, from whitebox to final product. The prototype and vertical slice of the game was developed during four milestones.
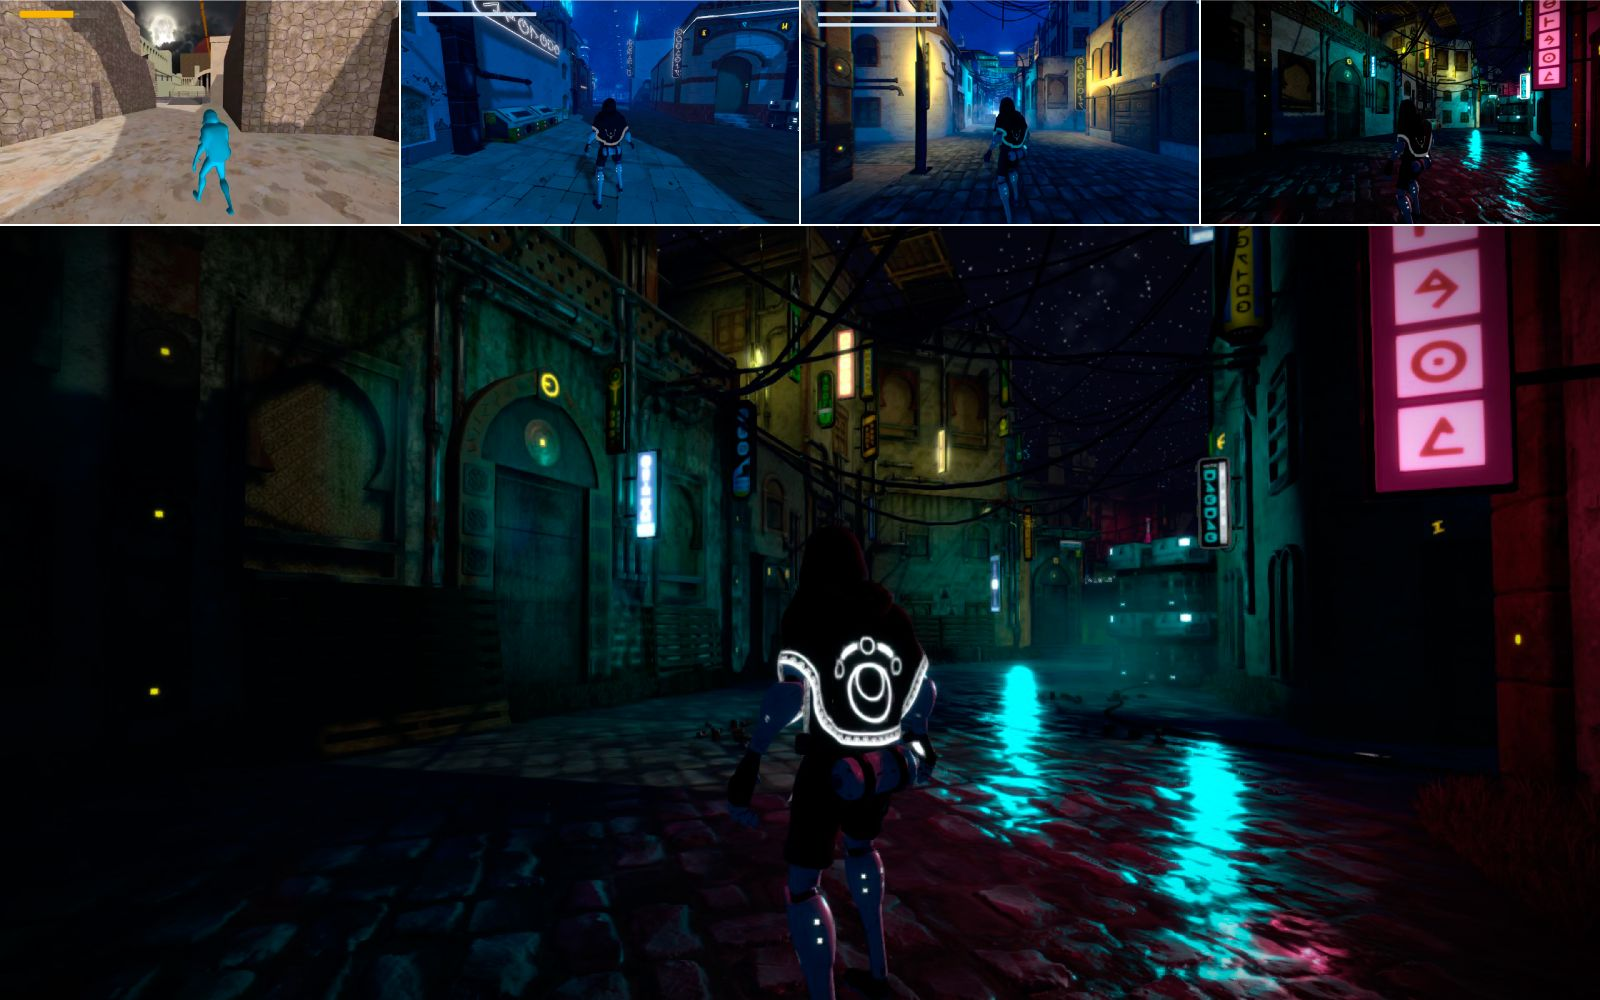
I want to highlight the creation of the main mechanic based on shadow detection and the character controller, which can use shadows to merge and traverse through them both vertically (walls) and horizontally (floors). I was responsible for developing the motion system through the camera, as well as the character movement and the main mechanic.
The character controller is based on a finite state machine (FSM) that was previously designed with a state diagram during the design phase. This state machine was implemented in the game's code using the FSM class.
The FSM class allows maintaining a series of states for the player, as well as a series of transitions between these states, determined by one or more variables.
The following LINK contains all the source code related to gameplay.
Regarding the physics of the engine, an abstract layer was developed to manage the physics of the player and the environment, using Unity as a reference.
The code was restructured into the physics_collider.cpp class, which contains actor information and collider properties at the PhysX level. This class uses a factory pattern to create different types of colliders based on the specified shape. Filters were also added for collision detection using different layers.
Collider management was improved by enabling the creation of colliders through convex meshes, which is crucial for accurately detecting shadows at specific points. Additionally, functions were developed for querying the scene, such as Raycast and Sweep. Raycast is particularly important for testing against colliders, while Sweep is used to detect volumes within colliders and anticipate collision issues.
On the other side, the main mechanic allows the player to merge into shadows and move through them. Once inside the shadows, the player can move along walls and floors, except for ceilings. Within the main mechanic and the player's movement while in shadow merge, the following essential game features have been programmed:
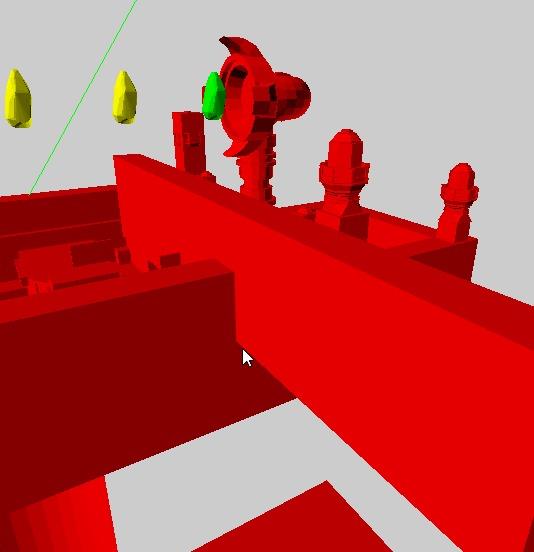
Shadow Detection: Shadow detection is based on the use of pre-calculated light volumes and raycasting. To achieve this, it was necessary to use the PhysX physics engine. The shadow state controller is located in the shadow_controller.cpp component, which is associated with the player entity. The main idea behind shadow detection is similar to that used in rendering: casting rays from the light source to check for intersections. If an intersection occurs, that point is in shadow. Three types of lights are distinguished:
- Directional Light: A ray is cast from the light source to the player.
- Spotlight or Point Light: It checks if the player is within the light volume, which has been pre-calculated. If so, a ray is cast from the light source.
If any of the above tests are positive, the player is in a lighted area and therefore cannot merge into the shadows.
Shadow Merge Movement: The player's main movement while in the shadows is achieved using raycasts that allow detecting when the player changes surfaces. Two types of tests are performed:
- Concave Test: By casting a ray at a certain offset diagonally toward the ground, it detects if the player will change surfaces at an angle greater than 90 degrees, such as moving from a wall to a roof.
- Convex Test: By casting a ray horizontally, it determines if the player is moving from a floor to a wall.
Graphics Programming:
During the development of Atlas fate, I was in charge of developing all the graphics related core elements from the engine and the game.
I was in charge of the creation of the deferred renderer and the whole rendering pipeline that was later used in the game.
The following LINK contains the source code for the rendering pipeline of the engine.
Along of other key features of the game, we have to mention the following ones:
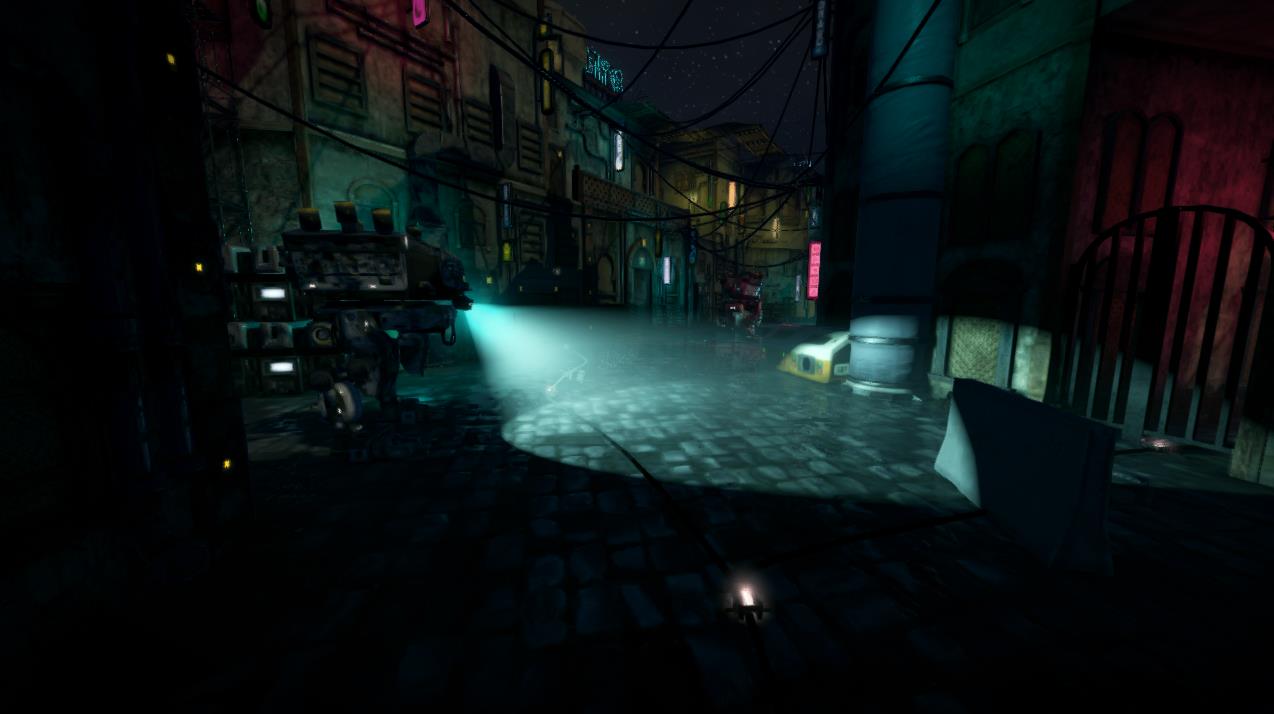
Volumetric Lighting
The game has state of the art volumetric rendering. The method here was inspired by Lords of the Fallen implementation, shown in its GDC talk.
A few modifications were later added to improve performance and functionality given our main mechanic setup. The following images show the results of the volumetric rendering ingame.
The following LINK contains the shader source code for volumetric lighting.
Compute Shaders / Instancing
Among many different rendering techniques used, instancing was extensively used in order to reduce draw calls drastically.
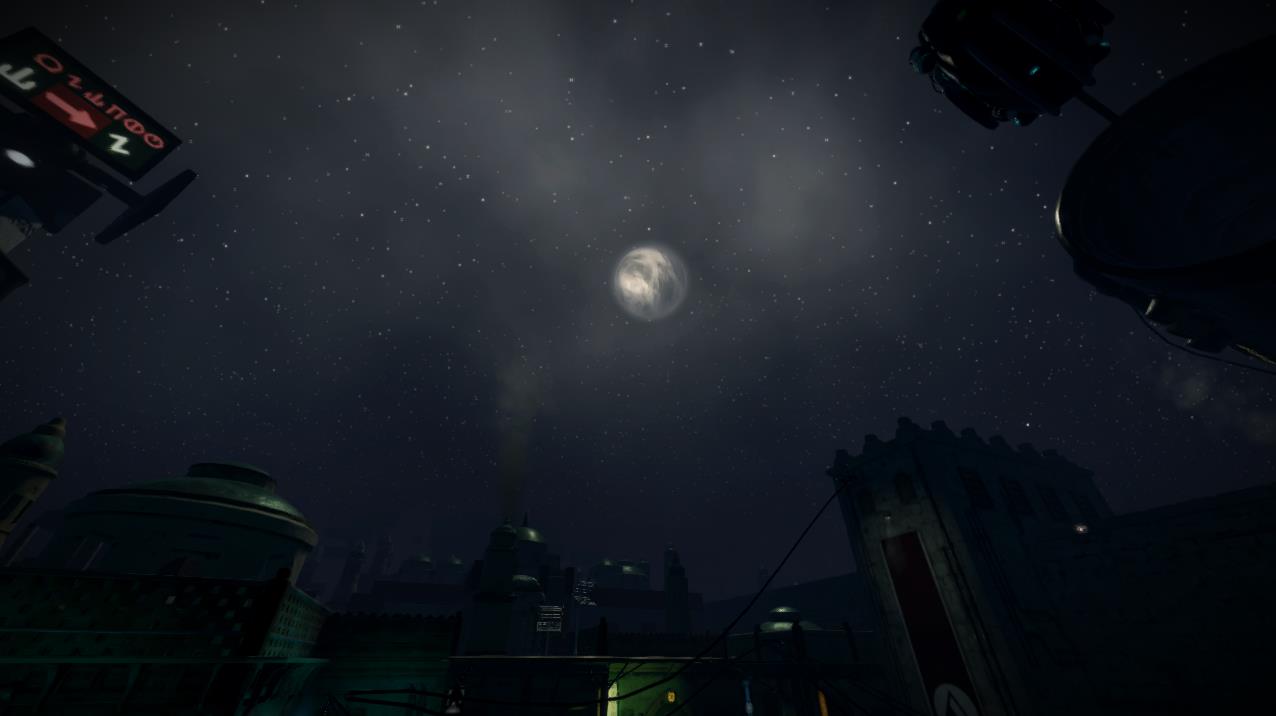
Also in some situations instancing wasn't enough, so a workaround was needed in order to get decent performance. One of these situations was stars rendering. In our case, we wanted to render thousands of stars in our sky. To do so, we created a particle system that, together with the use of compute shaders allowed us to have the desired effect, as shown in the following image:
The following LINK contains the shader source code for compute shaders and instanced particles.
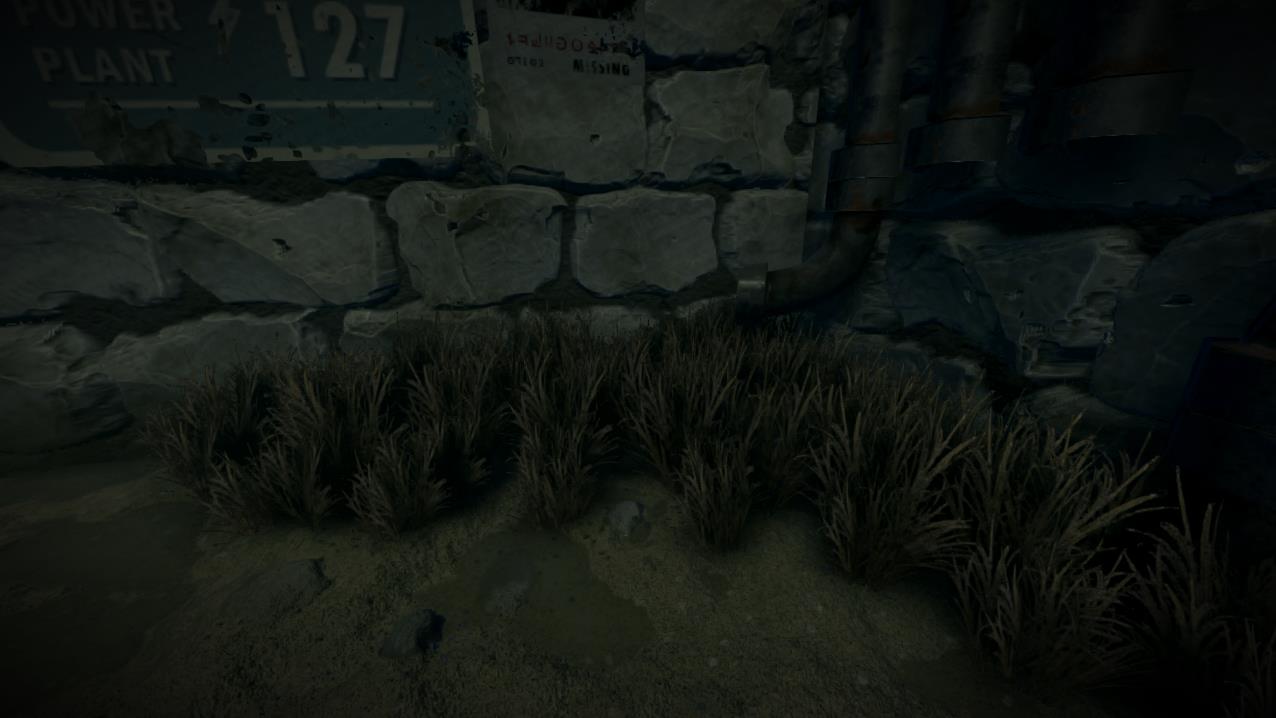
Parallax Mapping
We wanted to have a more realistic effect on some surfaces. To achieve this, one of the techniques used was parallax mapping. The method focus on shifting uvs in the shader, which allow us to give perception of depth per pixel. The following image shows how this was achieved in the rock textures from the walls. Also instanced grass is shown:
The following LINK contains the shader source code for parallax mapping.
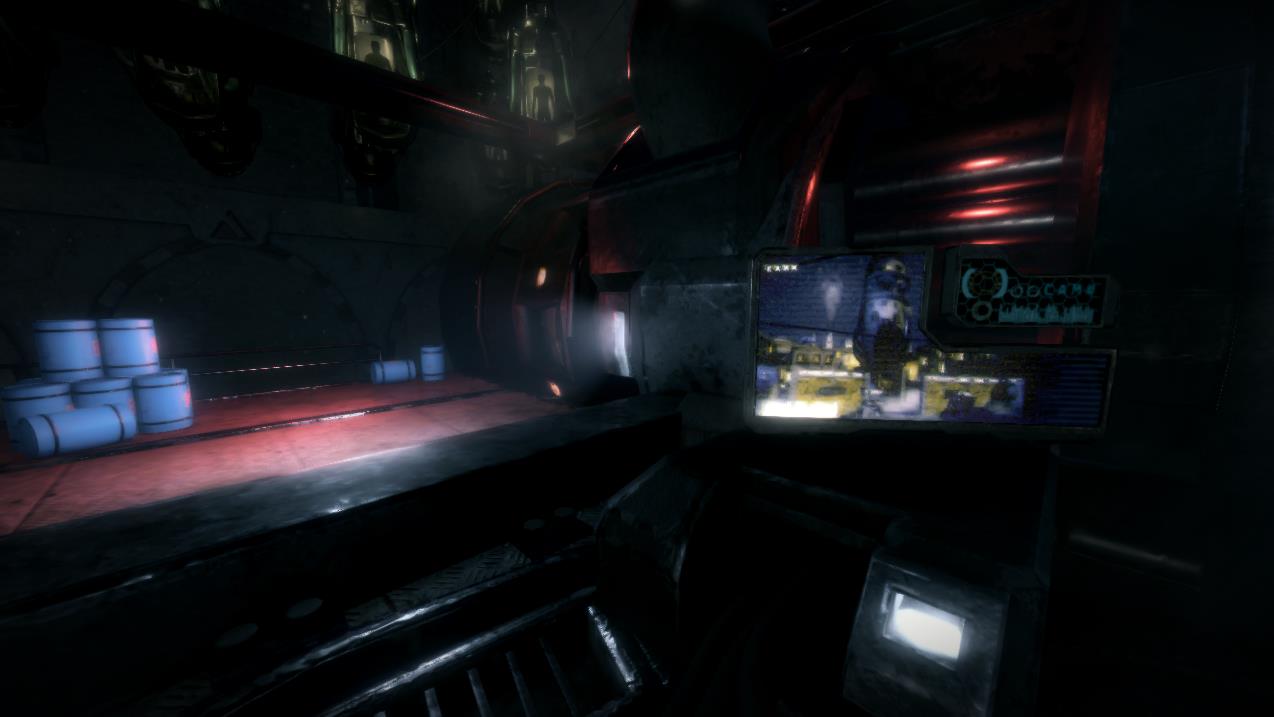
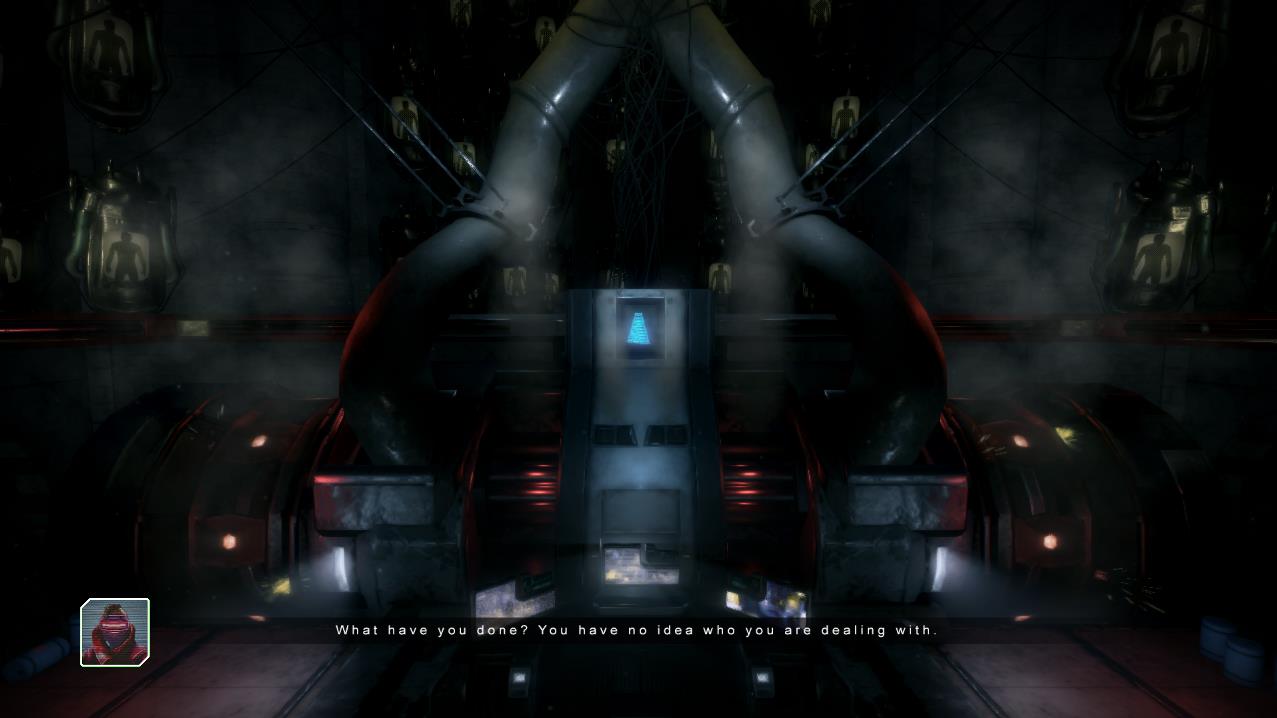
Holographic Shaders
Different holographic shaders were also created for the game. These combine noise pattersn together with scanline masks to create the desired cyberpunk effect in the game.
The following LINK contains the shader source code for holographic shaders.
Post Processing: Bloom + Lens Flare/Lens Dirt
The bloom of the game engine was implemented. Also to add a little bit of fanciness to our game, we also added the famous lens flare effect, as an screen space effect, together with lens dirt as it can be seen in the following images:
The following LINK contains the shader source code for post process bloom.
Post Processing: Sonar Wave
The sonar wave effect, inspired from the sonar effect of metal gear solid, is a postprocessing effect used as a mechanic where a sonar pulse is thrown from the player position and reveals enemies and mission objects. The shader uses a mask and the depth buffer to traverse a wave through the scene. On the other side, an outline mask is generated using a cpu script that iterates through the target objects and detects whether the wave has reached each object or not.
Post Processing: Screen Space Reflections (SSR)
Rendering technique used to create reflective surfaces by tracing reflections in screen space. In the following image the result can be seen (exaggerated):
The following LINK contains the shader source code for all the postprocessing effects from the game.
Particles
In order to implement the particles of the engine I took inspiration from other commercial engines such as Unity and Unreal.
The particle system uses in extense instancing and compute shaders in order to render thousands of particles per frame.
The system also, uses a series of engine tools that I created in order to easily edit this particles. In the following image we can see how the tools are embeded in the engine for debug purposes.

In the following images we can see some of the results of the particles created:
Tools Programming:
Creation of tools for artists in 3DS Max using MaxScript, as well as tools included within the engine for editing parameters and the scene. Regarding the MaxScript tools, I want to highlight the creation of an export tool, along with a series of utility tools, which enabled the artists in the group to learn how to export their own materials into the engine and generate the necessary content.
The following LINK contains the source code for all the maxscript tools created.